Configure users
Ensuring your application is secure and that users only access appropriate content is a critical part of the development lifecycle. KAIZEN manages this through a comprehensive IAM system built on RBAC.
Access control hierarchy
The access control model follows a clear hierarchy:
- User Domain: The top-level security boundary (e.g., "Internal Staff Portal" vs. "Public Customer Portal").
- User: An individual who logs into the system.
- Role: A collection of permissions representing a job function (e.g., "Administrator," "Customer," "Staff").
- Privilege: A specific, granular permission (e.g.,
staff_view,customer). - Resource: The asset being secured, such as pages, navigator menus, or API endpoints.
You can export users, roles, privileges, or resources and import them into the runtime of your deployed application.
Create a user
To create a user for your application, perform the following:
-
On the application card, click the three-dot icon
 and select Config Users.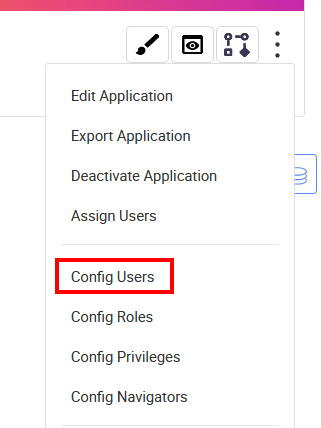
-
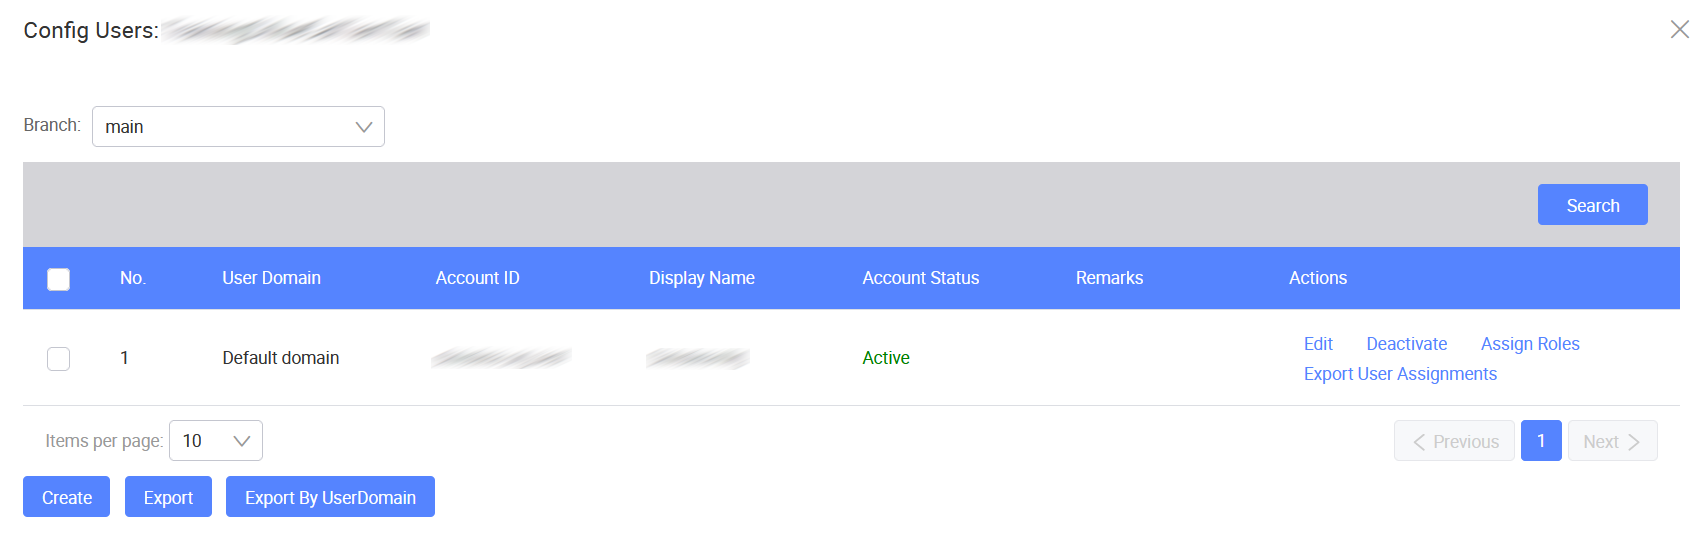
In the Config Users window, select the target branch from the Branch dropdown.
-
To add a new user, click Create.
-
In the Create User window, fill in the Account Info tab.
Field Mandatory Description User Account ID Yes The unique identifier for the user account. User Domain Yes The security boundary for the user (e.g., internal staff, public customer). Display Name Yes The name displayed in the application. Service Account User Yes Select Yes if this is a service account; otherwise, select No. Account Activation Period Yes The date range during which the account is active. Check the checkbox to enable the To date. Type Password Yes The password for the user account. Retype Password Yes Re-enter the password for confirmation. Password Challenge Question Yes A security question for password recovery. Password Challenge Answer Yes The answer to the password challenge question. Password Challenge Hint No An optional hint for the password challenge. -
(Optional) Switch to the Personal Info tab to fill in the user's personal details.
Field Mandatory Description User Picture No Upload a profile picture for the user. Salutation No Select from Mr, Ms, Mrs, Mdm, or Dr. First Name No The user's first name. Middle Name No The user's middle name. Last Name No The user's last name. Gender No Select Male, Female, or Unknown. Nationality No The user's nationality. Date of Birth No The user's date of birth. Marital Status No Select from Single, Married, Separated, Divorced, or Widowed. Identity No. No The user's identity document number. Passport No. No The user's passport number. E-Signature No Upload the user's electronic signature. -
Switch to the Contact Info tab to fill in the user's contact details.
Field Mandatory Description Email Yes The user's email address. Mobile Country Code No The country code for the user's mobile number. Mobile No. No The user's mobile phone number. Other Contact No. No An alternative contact number. Address No The user's address. Postal Code No The postal code. State No The state or province. Country No The user's country of residence. Remarks No Any additional notes about the user. -
Click Save. The user will appear in the Config Users window.
Export a user
To export a user as an XML file, perform the following:
-
In the Config Users window, select the users you want to export and click Export.
-
In the Confirm dialog, click OK to proceed.

An
XMLfile containing the user information will be downloaded to your local machine.
Export users by user domain
To export all users under a specific user domain as an XML file, perform the following:
-
In the Config Users window, click Export By UserDomain.
-
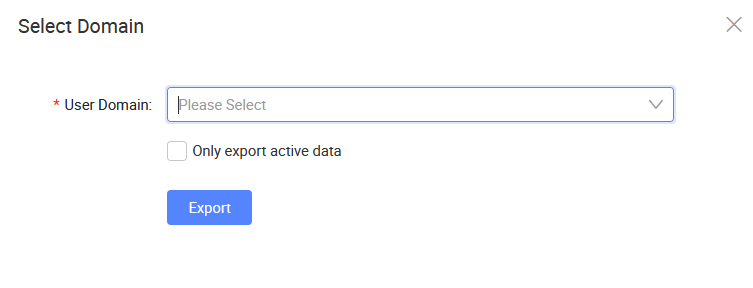
In the Select Domain window, select a User Domain from the dropdown.
Optionally, check Only export active data to exclude inactive users.
-
Click Export.
An
XMLfile containing the user information for the selected domain will be downloaded to your local machine.
Edit a user
After creating a user, you can edit the user information by clicking the Edit button on the same row.
Except User Account ID and User Domain, most fields can be updated. Refer to this section for more details.
After making the changes, click Save.
Deactivate a user
To deactivate a user, perform the following:
-
In the Config Users window, click Deactivate on the same row.

-
In the confirmation dialog, click OK to proceed.
A success message will confirm that the user has been deactivated.
After the deactivation, you have the option to reactivate it following the on-screen instructions.
Assign roles to a user
To assign roles to a user, perform the following:
-
In the Config Users window, click Assign Roles on the same row.
-
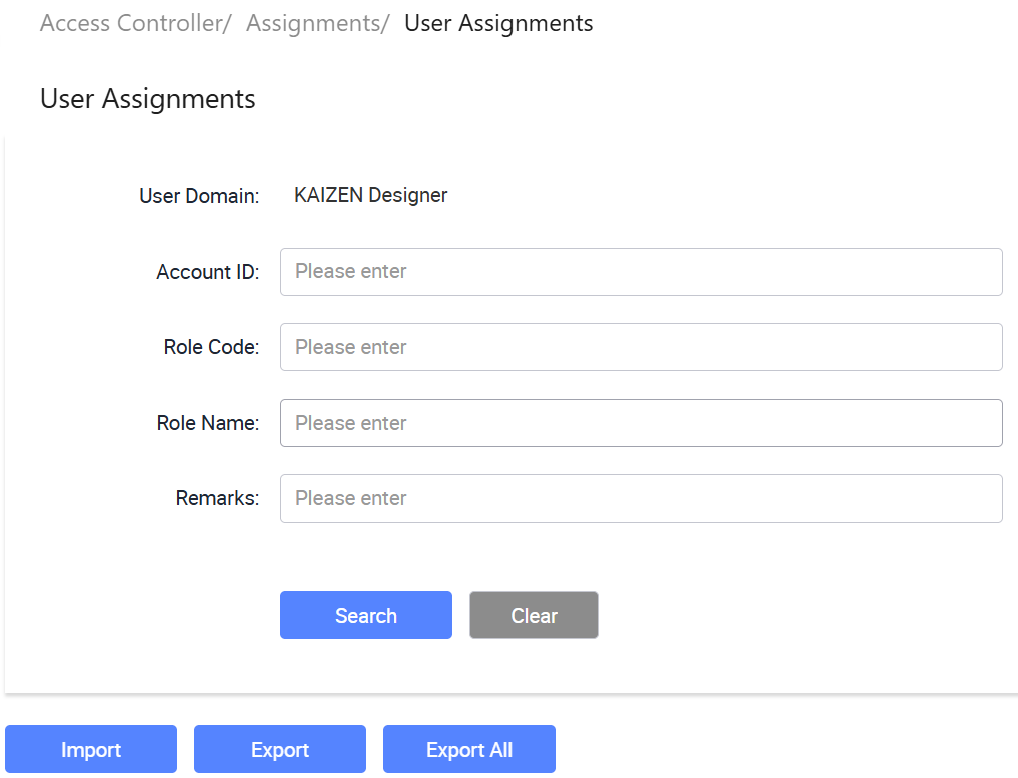
In the User Assignments window, the user's domain is displayed at the top. The window contains two sections:
- Assigned Project Roles: Lists the roles currently assigned to the user.
- Project Roles: Lists the available project roles that can be assigned.
-
In the Project Roles section, select the roles you want to assign and click Add. The selected roles will appear under Assigned Project Roles.
To remove an assigned role, select it under Assigned Project Roles and click Remove.
Export user assignments
To export a user's role assignments as an XML file, perform the following:
-
In the Config Users window, click Export User Assignments on the same row.
-
In the User Assignments window, select the user assignments you want to export and click Export.
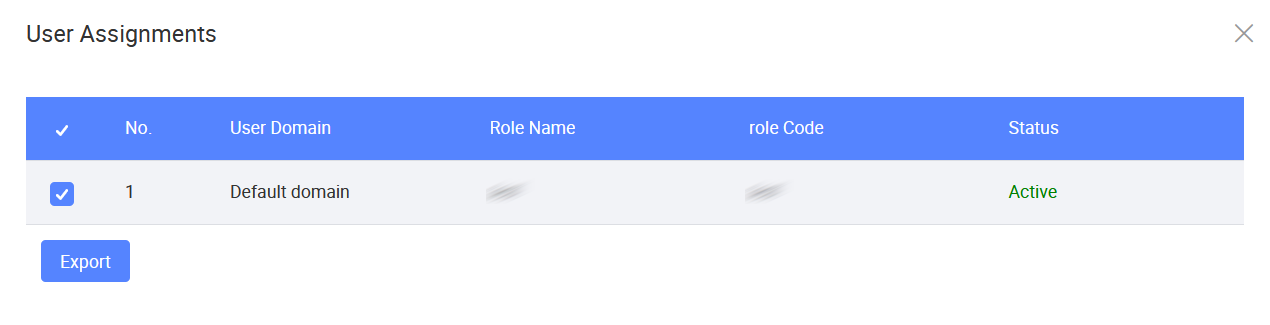
-
In the Confirm dialog, click OK to proceed.
An XML file containing the user's role assignments will be downloaded to your local machine.
Last updated on 20 May 2026