KAIZEN setup
Assumption: The users who will perform the deployment should understand databases and Kubernetes.
In this article, you will deploy the KAIZEN platform to your project environment.
To reduce any possible errors, follow these instructions from beginning to end and avoid changing the sequence.
You can use a TOPPAN Ecquaria product Ecquaria Docking Services (EDS) for the deployment, or another tool based on your project requirements. The instructions below will focus on scenarios for using EDS.
Prerequisites
Before getting started, be sure to fulfil the following preconditions.
Set up Redis
It is recommended to use version 7 for Redis.
Ensure that a Redis instance is running.
It can be Amazon ElastiCache or a local Redis installation, based on your project requirements.
Get the KAIZEN release
Get a copy of the KAIZEN release files in the version you want to deploy.
Contact your TOPPAN Ecquaria representative to obtain any relevant files.
Configure the project and environment in EDS
If you are using EDS, be sure to perform the following:
-
Create your project.
-
Create an environment for your project.
-
Ensure that the correct project is selected.
-
Enable the Only View Objects Created from This Environment option.
-
Upload the
JSONfile containing Kubernetes configuration. Click the Test Connection button.If the test is successful, the Default Namespace option will appear below.
-
If available, select
kaizenas the default namespace to be used.Otherwise, create a new namespace to replace the default.
-
-
Perform a sanity test on the Kubernetes cluster. For example (non-exhaustive), verify the following:
-
All pods in the kube-system namespace are running.
-
Pods hosted in different nodes communicate with each other.
-
You are able to pull images from your repositories.
-
Configure database
-
Create a database within Postgres, MySQL, or SQLServer.
-
In the database, expand Schemas to ensure the following are created:
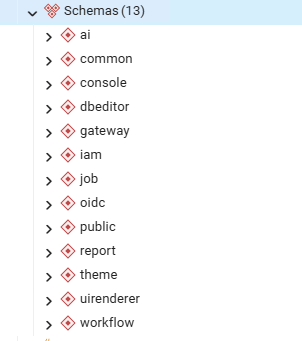
Schemas include:
• ai• common• console• dbeditor• gateway• iam• job• oidc• report• theme• uirenderer• workflow
The public schema shown in the above screenshot was created by default in Postgres.
Install KAIZEN using EDS
Import snapshot
-
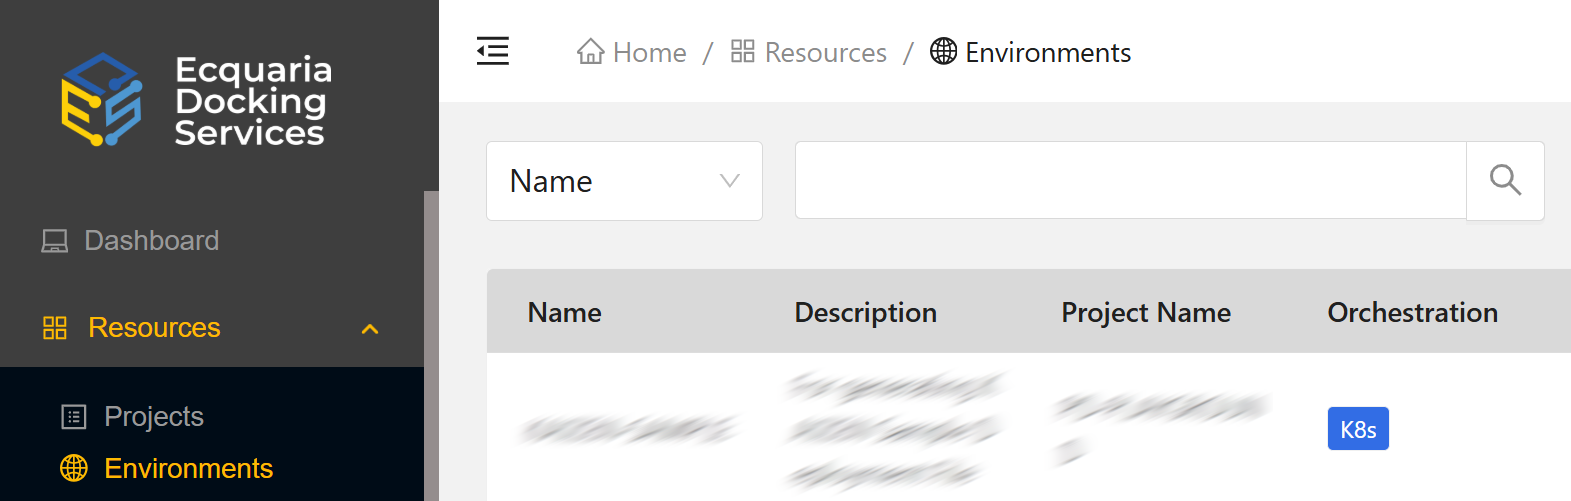
Log into EDS. Navigate to Resources > Environments.
-
Search for the environment to be used for the deployment on the right.
-
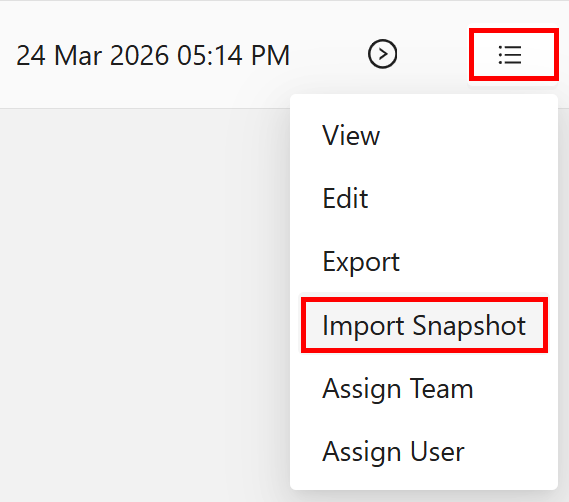
On the same row of the environment, click the menu and select Import Snapshot.
-
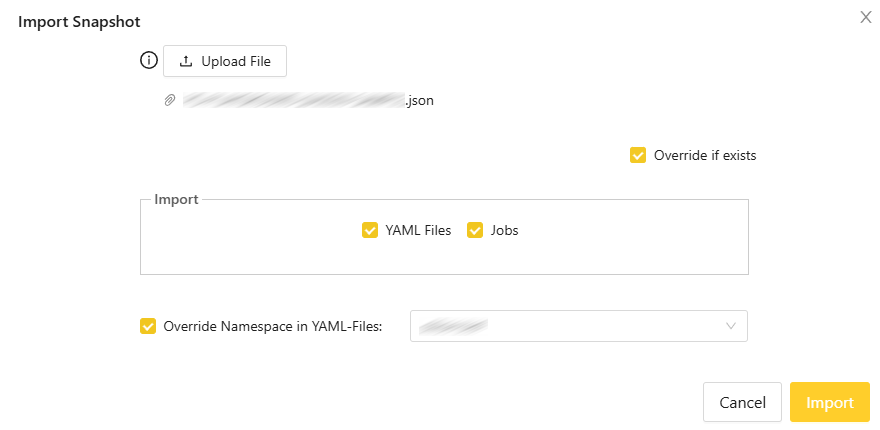
Click Upload File to browse for and upload the snapshot file in
JSONformat (KAIZEN_KAIZEN-YYYYMMDD.json) provided in the release.- Based on your project requirements, select YAML Files (Mandatory) and Jobs (Optional).
- Set the
namespacefor all manifests by selecting Override Namespace in YAML-Files and entering the value.
-
Click Import. The import process starts.
-
Upon the completion of the import, navigate to Resources > YAML Files to view the uploaded artifacts shown in the App list.
For the deployment not using EDS, you need to deploy the YAML file manually via another tool based on your project requirements. The provided KAIZEN YAML files must use the same stack name as listed in the following section.
Deployment YAML manifests
To view or edit the manifests, open Resources > YAML Files. Select your project and search for each manifest by name.
| # | Name | Description |
|---|---|---|
| 1 | kaizen-be-cm-config | This stack is used to deploy the application properties held by ConfigMap for KAIZEN BE (backend) services. |
| 2 | kaizen-fe-cm-config | This stack is used to deploy the config.json properties overridden by ConfigMap for KAIZEN FE (frontend) services. |
| 3 | kaizen-be-theme-config |
|
| 4 | kaizen-be-app-secret | This stack is used to deploy the Kubernetes secrets e.g., jdbc datasource connection password for KAIZEN BE services. |
| 5 | kaizen-be-keystore-secret | This stack is used to deploy Kubernetes secrets e.g., keystore for KAIZEN BE services to accept TLS connections. |
| 6 | kaizen-be-truststore-secret | This stack is used to deploy Kubernetes secrets e.g., truststore for KAIZEN BE services to perform TLS connections. |
| 7 | kaizen-be-jwt-cert-secret | This stack is used to deploy Kubernetes secrets e.g., JWT signer certificate for KAIZEN BE services to issue and verify JWT tokens. |
| 8 | kaizen-setup |
|
| 9 | kaizen-be-core & kaizen-be-core-service | This stack is used to deploy KAIZEN core BE services. |
| 10 | kaizen-be-admin & kaizen-be-admin-service |
|
| 11 | kaizen-be-studio & kaizen-be-studio-service |
|
| 12 | FE container | Starting with version 5.1.0, KAIZEN has streamlined its frontend deployment by combining multiple FE container images into a single container. Choose one of the following options:
|
| 13 | kaizen-ai (New in version 5.1.0) |
|
| 14 | kaizen-uirenderer (New in version 5.3.0) |
|
| 15 | kaizen-fe-app-gateway |
|
| 16 | kaizen-migration-volume |
|
| 17 | kaizen-fe-oidc & kaizen-be-oidc | This stack is used to deploy KAIZEN OIDC services. |
Perform modifications
Be sure to update the datasource settings, modify BE and FE application configurations, apply labels to nodes, and configure nginx service.
Datasource
Apply the instructions in this section only to the following manifest list.
Manifest list:
kaizen-setupkaizen-be-studiokaizen-be-adminkaizen-be-core
Instructions:
-
In EDS, navigate to Resources > YAML Files.
-
For each manifest listed above, ensure that all JDBC strings are valid, especially the database type, host, and port.
-
An example of a valid JDBC string for MySQL database:
jdbc:mysql://{IP_Address}:{Port}/console?serverTimezone=Asia/Singapore&useUnicode=true&characterEncoding=utf8&characterSetResults=utf8&useSSL=false&allowMultiQueries=true&stringtype=unspecified&allowPublicKeyRetrieval=true
-
-
After each modification, click the Save button.
-
For database password, update
kaizen-be-app-secretto fit your use case.You need to update two sets of database password, for example:
-
db.user.gateway.vaultused for KAIZEN service to access the database for daily operations. -
db.admin.user.gateway.vaultused for KAIZEN setup service to access the database for creating tables or views, with the necessary database DDL access rights.
-
BE application configurations
Apply the instructions in this section only to the following manifest list.
For details on a complete list of Spring Boot properties, refer to the Spring Boot documentation.
Manifest list:
kaizen-be-cm-config
Instructions:
-
Redis cache configuration
Property Name Default Value Description spring.data.redis.hostkaizen-redis-service.kaizen.svc.cluster.localHostname of the Redis cache service KAIZEN should connect with spring.data.redis.password- Password to connect with Redis cache service if required spring.data.redis.port6379Port number of the Redis cache service KAIZEN should connect with spring.data.redis.ssl.enabledDefault follows server.ssl.enabledFlag to determine whether KAIZEN should connect with Redis cache service via TLS connection. Accept trueorfalsevaluespring.redis.ssl.key-storeDefault follows server.ssl.key-store-passwordFile path of the keystore to be used for SSL connection to connect with Redis cache spring.redis.ssl.key-store-passwordDefault follows server.ssl.key-store-passwordPassword of the keystore to be used for SSL connection to connect with Redis cache spring.redis.ssl.trust-storeDefault follows server.ssl.trust-storeFile path of the truststore to be used for SSL connection to connect with Redis cache spring.redis.ssl.trust-store-passwordDefault follows server.ssl.trust-store-passwordPassword of the truststore to used for SSL connection to connect with Redis cache -
JWT configuration
Property Name Default Value Description com.ecquaria.lowcode.iam.access.jwt.issuerecq-jwt-issuerIssuer claim value to be set for KAIZEN to issue JWT token com.ecquaria.lowcode.iam.access.jwt.trusted.issuersecq-jwt-issuerIssuer claim value of the JWT token for KAIZEN to validate com.ecquaria.lowcode.iam.access.jwt.refresh-token-expiration-sec-admin1800JWT refresh token validity in terms of seconds when issued com.ecquaria.lowcode.iam.access.jwt.session-token-expiration-sec-admin900JWT access token validity in terms of seconds when issued com.ecquaria.lowcode.iam.access.jwt.signer.key.location/certs/jwt/signer-private-key-rsa.pemFile path of the JWT signer key location com.ecquaria.lowcode.iam.access.jwt.trusted.cert.location/certs/jwt/signer-public-key-rsa.pemFile path of the JWT trusted cert for validating the integrity of the JWT token security.token.cookie.prefixkaizen-cookieCookie name prefix for JWT tokens -
Configuration for the transit of password encryption
Property Name Default Value Description com.ecquaria.lowcode.iam.access.password.enc.key.location/certs/jwt/signer-private-key-rsa.pemPath to the key to be used for encryption and decryption of password in transit -
CSRF configuration
Property Name Default Value Description tecq.lowcode.gateway.csrf.enabledtrueFlag to control whether KAIZEN enables CSRF checking security.token.cookie.csrf.prefixkaizen-cookie-csrfcookie prefix for CSRF Token security.token.cookie.csrfkey.prefixkaizen-cookie-csrf_keycookie prefix key for CSRF token -
KAIZEN service TLS configuration
Property Name Default Value Description server.ssl.enabledtrueFlag to configure whether KAIZEN services should run as TLS services. Accept trueorfalsevalueserver.ssl.key-aliasKAIZENKey alias used to run KAIZEN services as TLS services server.ssl.key-store-typePKCS12Keystore type used. Accept PKCS12orJKSvalueserver.ssl.key-storefile:/certs/keystore/kaizen-keystore.p12File path to the keystore used for TLS connections server.ssl.key-store-password- Password of the keystore server.ssl.trust-store-typePKCS12Truststore type used. Accept PKCS12orJKSvalueserver.ssl.trust-storefile:/certs/truststore/kaizen-truststore.p12File path to the truststore used for TLS connections server.ssl.trust-store-password- Password of the truststore -
KAIZEN service mesh configuration
Property Name Default Value Description use.mesh.nametrueFlag to configure whether KAIZEN should use its own service mesh setup. If using Istio Service Mesh, this should be set to false. Accepttrueorfalsevalueservice.names.mesh{"setup":{"host":"setup.kaizen.svc.cluster.local","port":8089,"contextPath":""},"gateway":{"host":"gateway.kaizen.svc.cluster.local","port":8081,"contextPath":""},"iam":{"host":"iam.kaizen.svc.cluster.local","port":8082,"contextPath":""},"common":{"host":"common.kaizen.svc.cluster.local","port":8084,"contextPath":""},"job":{"host":"job.kaizen.svc.cluster.local","port":8085,"contextPath":""},"workflow":{"host":"workflow.kaizen.svc.cluster.local","port":8087,"contextPath":""},"console":{"host":"console.kaizen.svc.cluster.local","port":8083,"contextPath":""},"pagescan":{"host":"pagescan.kaizen.svc.cluster.local","port":8086,"contextPath":""},"theme":{"host":"theme.kaizen.svc.cluster.local","port":8090,"contextPath":""},"dbeditor":{"host":"dbeditor.kaizen.svc.cluster.local","port":8091,"contextPath":""},"report":{"host":"report.kaizen.svc.cluster.local","port":8088,"contextPath":""},"ai":{"host":"ai.kaizen.svc.cluster.local","port":7860,"contextPath":""}}KAIZEN Service Mesh configuration in JSONformat. EachJSONitem is one service configuration in the format of<service name>:{host:<service hostname>, port: <service port number>}
e.g."setup":{"host":"setup.kaizen.svc.cluster.local","port":8089}service.public.white.path.additional.list'[{"path":"/xxx/api/v1/xxx/services","method":"GET"}, … }]'A list of additional endpoints to be whitelisted for security checks
FE application configurations
Apply the instructions in this section only to the following manifest list.
For details on a complete list of Spring Boot properties, refer to the Spring Boot documentation.
Manifest list:
kaizen-fe-cm-config
Instructions:
-
KAIZEN FE application configuration
The following configurations are deployed in
JSONformat in theconfig.jsonfile.Property Name Default Value Description CSRF_TOKEN_PREFIXkaizen-cookie-csrfCSRF Token cookie name to be used by FE application DYNAMIC_USER_DOMAIN_CODES- Custom user domain code to be accepted by KAIZEN
Apply labels to the nodes
-
In EDS, navigate to Resources > Nodes.
-
On every node usable for KAIZEN deployment, add this label:
kaizen: 'Y'
-
Upon completion, click Save.
Configure nginx service
-
In EDS, navigate to Resources > YAML Files.
-
Search for the job with the name
kaizen-fe-app-gateway. -
In the context menu on the right, click Edit.
-
In the editor, search for the Kubernetes service named
kaizen-fe-app-gateway-service. -
Modify the
NodePortvalue as required. -
Upon completion, click Save.
Start the KAIZEN application
Apply the instructions in this section to the following manifest list.
Manifest list:
kaizen-be-cm-configkaizen-fe-cm-configkaizen-be-app-secretkaizen-be-npm-secretkaizen-be-keystore-secretkaizen-be-truststore-secretkaizen-be-jwt-cert-secretkaizen-infrakaizen-setupkaizen-be-corekaizen-be-core-servicekaizen-be-studiokaizen-be-studio-servicekaizen-fe-studioorkaizen-fe-adminkaizen-fe-studio-serviceorkaizen-fe-admin-servicekaizen-ai- [Optional] only required when it has been deployedkaizen-uirenderer- [Optional] only required when it has been deployedkaizen-fe-app-gateway
Instructions:
-
In EDS, navigate to Resources > YAML Files.
-
For each manifest in the same order as listed above, in the context menu on the right, click Apply.
Wait until each deployment is running, then move on to the next.
Perform the initial setup
-
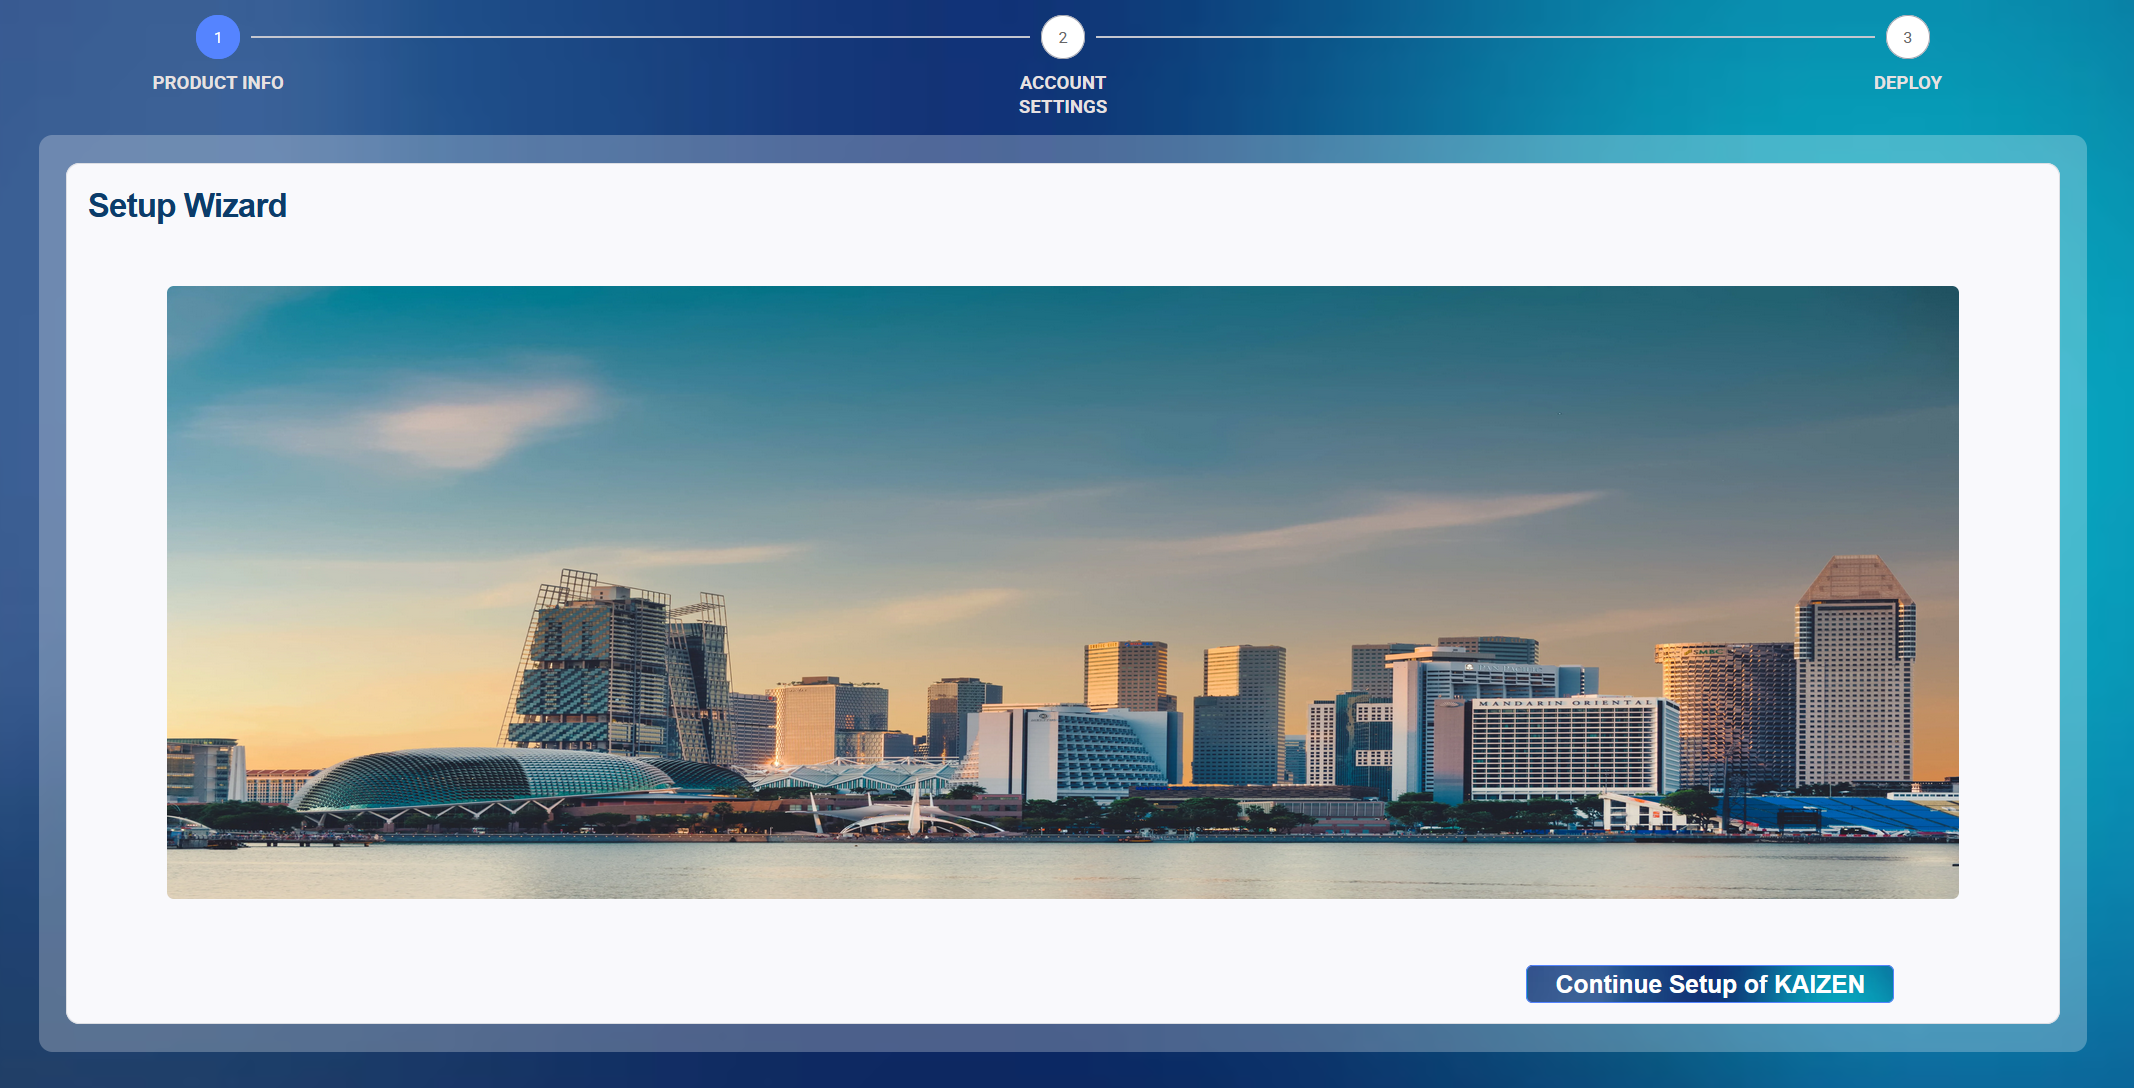
Navigate to the KAIZEN setup page.
If you have a load balancer for the cluster workers, use that address. Otherwise, directly use the address of any worker.
-
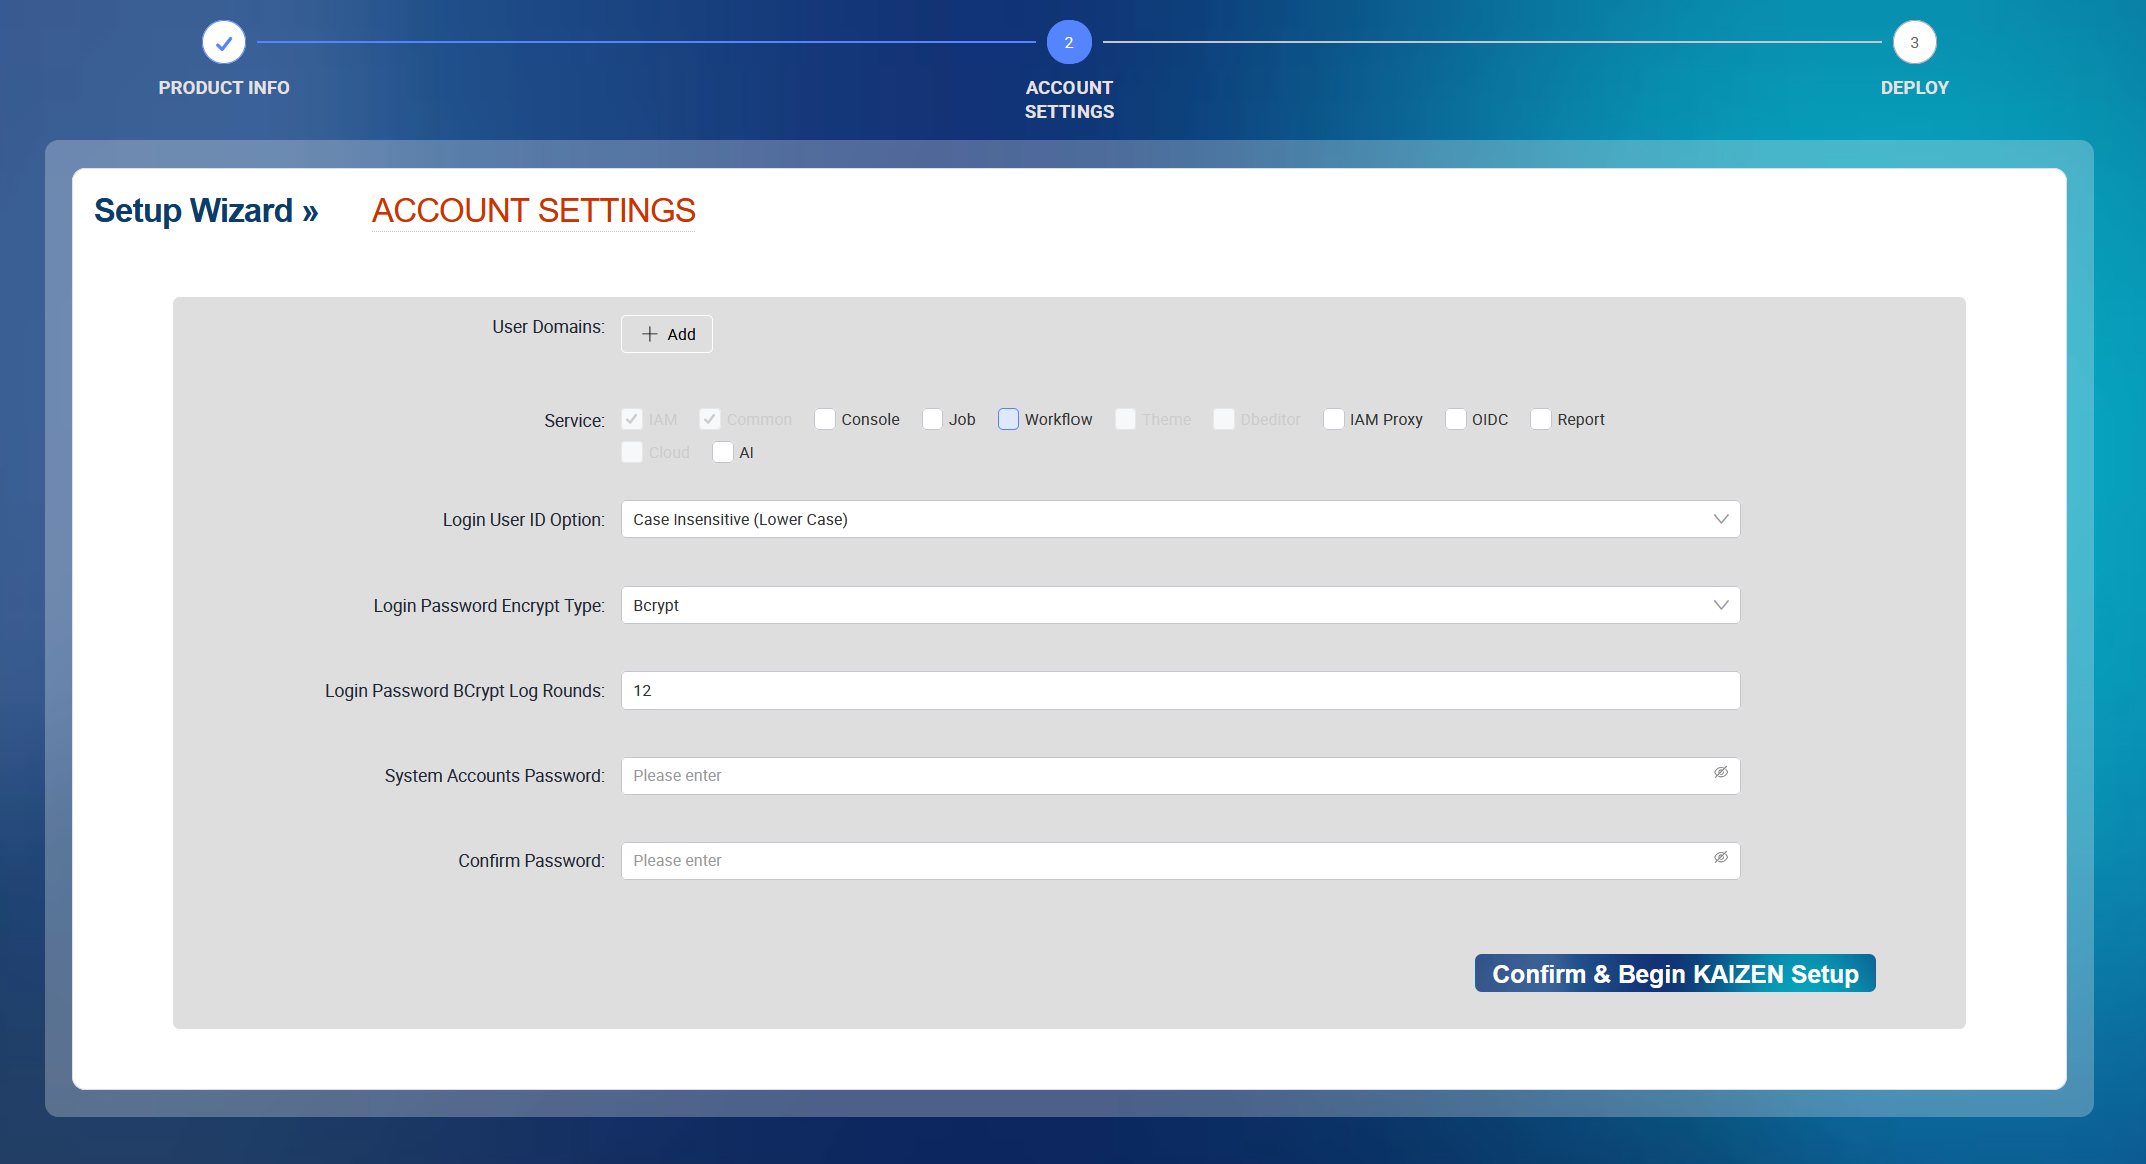
Click Continue Setup of KAIZEN.
-
In this screen, KAIZEN will detect and display the KAIZEN services that were deployed. Please verify that all required services are deployed.
-
Configure the setup parameters as required.
-
You may add project custom user domains as required by clicking Add. The left column is the user domain code and the right column is the display name of the user domain.
noteYou can skip this step if you are not sure of the custom user domains to be created. You can still create user domains after setting up KAIZEN by logging in as kaizenadmin of the KAIZEN Default user domain and create new user domains.

-
Select the backend services that you want to set up, according to your project requirements. To set up KAIZEN Designer services such as DB editor and theme services, you need to check console service first.
-
Select the case sensitivity of KAIZEN login user ID.

-
Select the password hashing function and its strength.
cautionThis cannot be changed after setup. The following screenshots are showing the default values.
- Bcrypt:

- Scrypt:

- HASH:

-
Enter the default password of the admin users. You can refer to the default password in the provided deployment stack
kaizen-be-app-secret. Look for thesystem.user.admin.vaultproperty.note- You can choose not to use the default value by updating the default password stack before the actual deployment and enter the new default password here.
- It is recommended to use the provided default password here and change the password to your preference after KAIZEN initial setup is completed.

-
-
Click Confirm & Begin KAIZEN Setup (as shown in Step 2) to start.
-
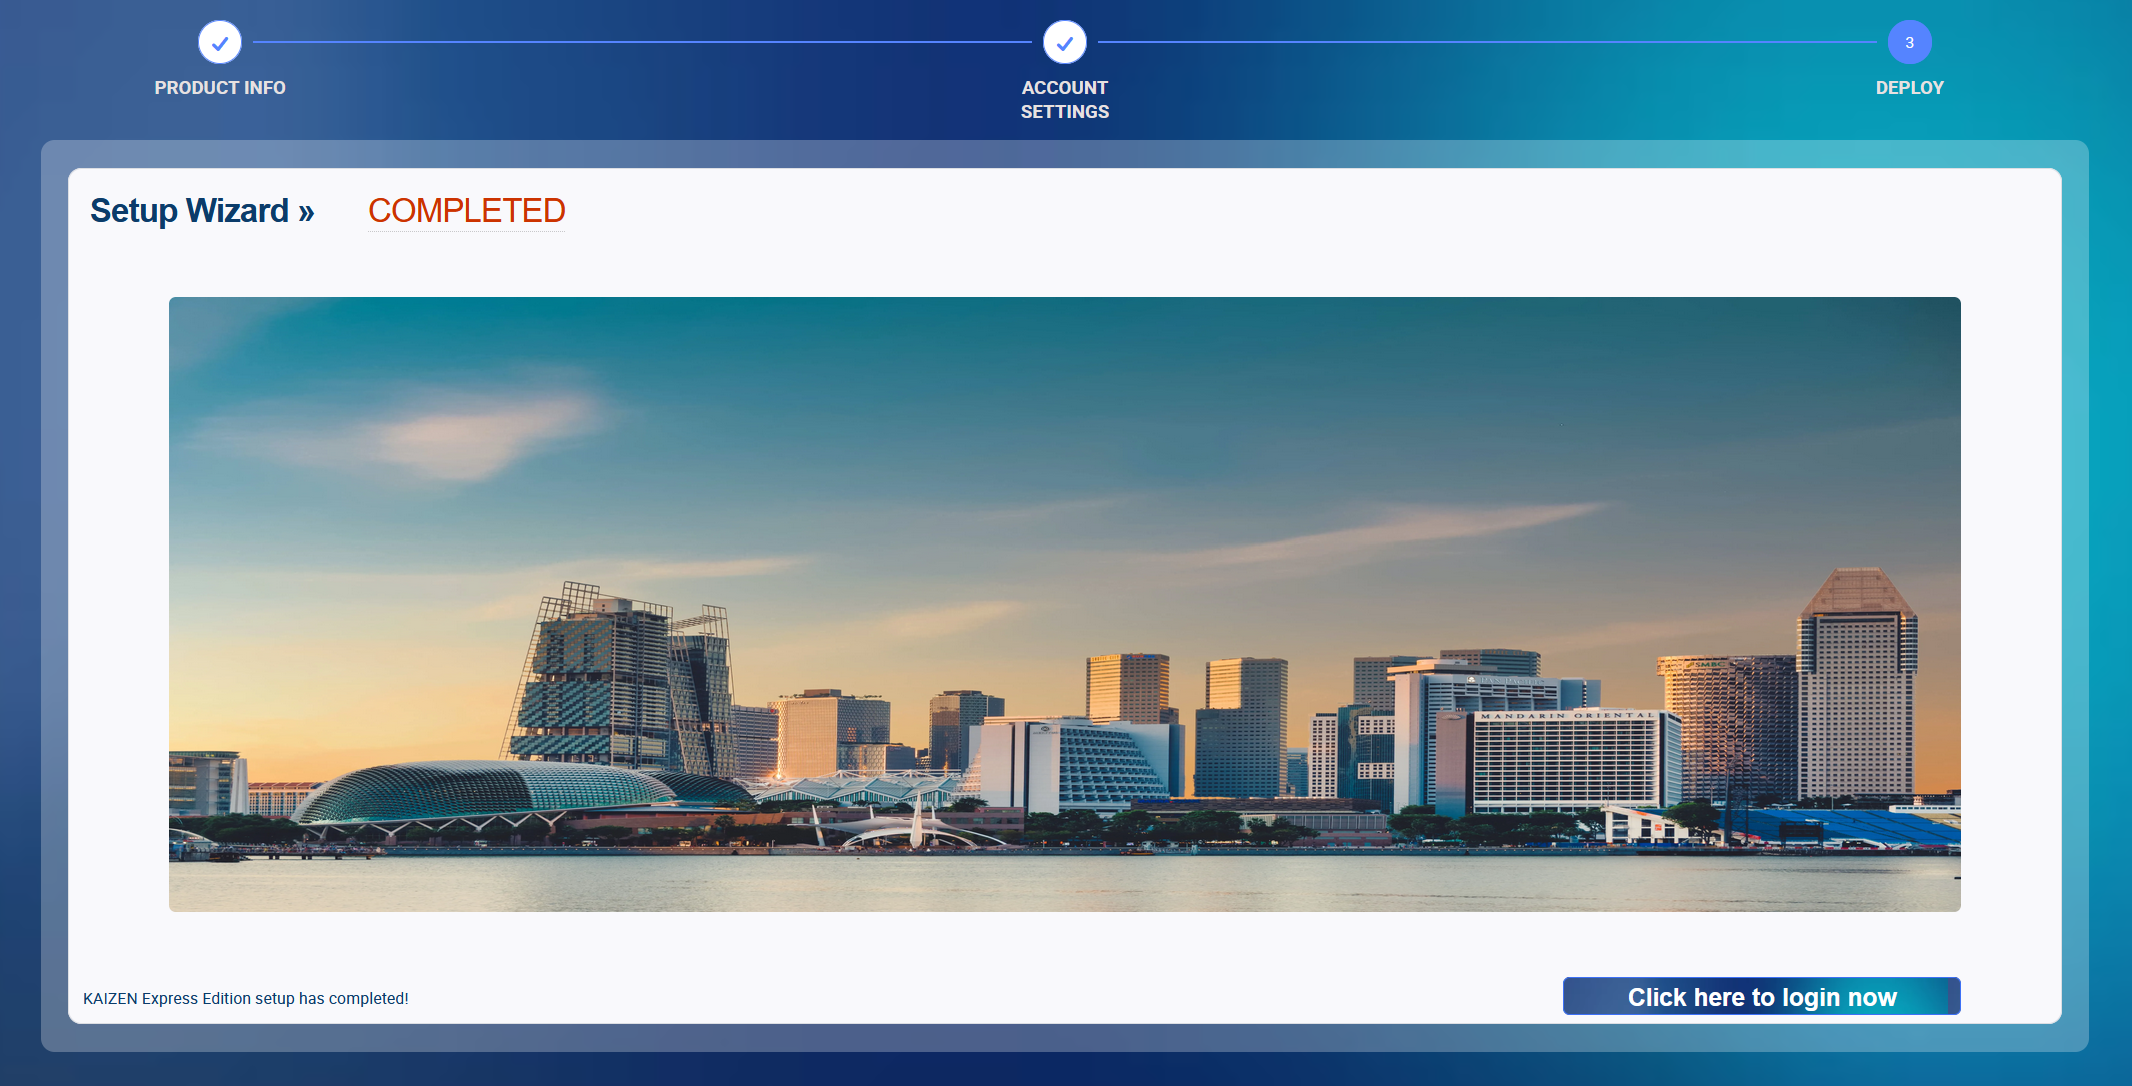
Wait until the initial setup shows completed.
-
Restart the following manifests in the same order as listed:
kaizen-be-corekaizen-be-adminkaizen-be-studio
Log into KAIZEN
To log into the KAIZEN application you have deployed, perform the following:
-
Navigate to the KAIZEN landing page.
-
Select the KAIZEN Default user domain, enter the username kaizenadmin, and type the password.
If the login is successful, the setup of KAIZEN is complete.
Last updated on 21 Sep 2026