User settings and preferences
In Studio Console, click the downward arrow near your name in the top right corner. The user menu displays Edit Profile, Change Password, Settings, About, and Logout.
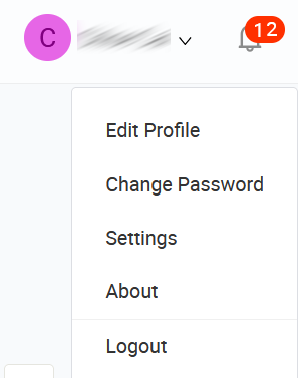
Edit profile
To edit your profile, perform the following:
-
From the user menu, click Edit Profile.
-
In the Edit Profile window, review the Account Info tab and make necessary changes.
Field Mandatory Description Account ID Yes The unique identifier for the user account. This value is read-only. User Domain Yes The security boundary for the user. This value is read-only. Display Name Yes The name displayed in the application. Password Challenge Question Yes A security question for password recovery. Password Challenge Answer Yes The answer to the password challenge question. Password Challenge Hint No An optional hint for the password challenge. -
(Optional) Switch to the Personal Info tab to edit your personal details.
Field Mandatory Description User Picture No Upload a profile picture for the user. Salutation No Select from Mr, Ms, Mrs, Mdm, or Dr. First Name No The user's first name. Middle Name No The user's middle name. Last Name No The user's last name. Gender No Select Male, Female, or Unknown. Nationality No The user's nationality. Date of Birth No The user's date of birth. Marital Status No Select from Single, Married, Separated, Divorced, or Widowed. Identity No. No The user's identity document number. Passport No. No The user's passport number. E-Signature No Upload the user's electronic signature. -
Switch to the Contact Info tab to edit your contact details.
Field Mandatory Description Email Yes The user's email address. Mobile Country Code No The country code for the user's mobile number. Mobile No. No The user's mobile phone number. Other Contact No. No An alternative contact number. Address No The user's address. Postal Code No The postal code. State No The state or province. Country No The user's country of residence. Remarks No Any additional notes about the user. -
Click Save to apply your changes.
Change password
Use Change Password to update the password for your current user account.
-
From the user menu, click Change Password.
-
In the User Change Password window, enter your current password.
-
Enter your new password.
-
Enter the new password again in Confirm Password.
-
Click Save.
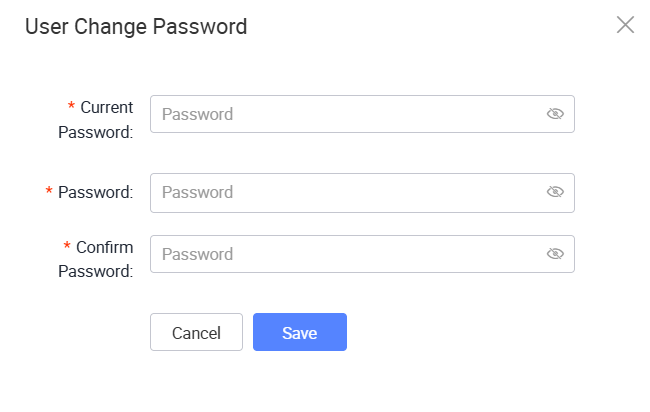
Fields marked with an asterisk (*) are mandatory.
Settings
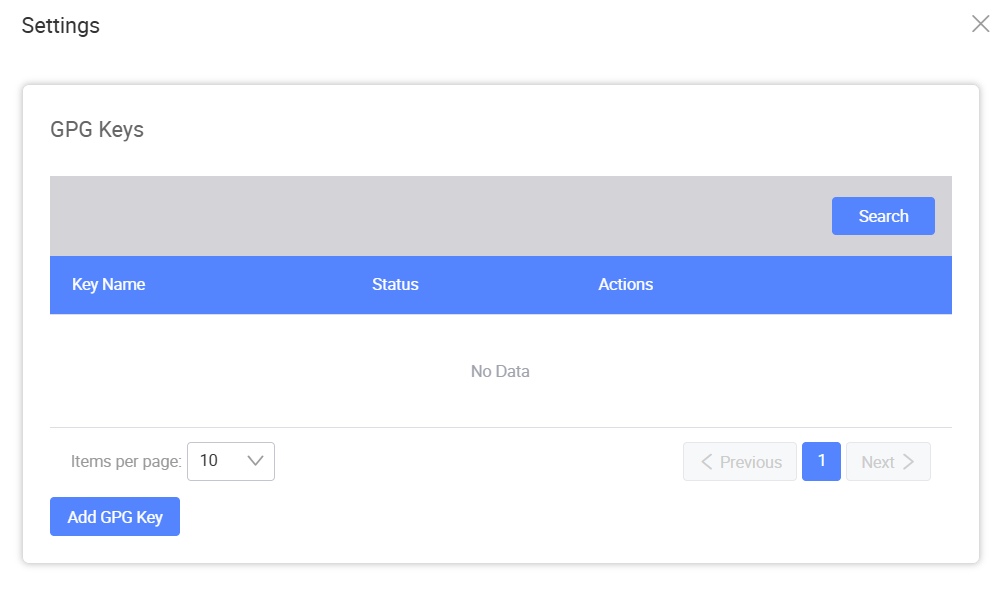
Use Settings to manage the GPG keys associated with your user account. GPG keys are used when KAIZEN needs to sign Git-related operations for your account.
-
From the user menu, click Settings.
-
In the GPG Keys section, review the existing keys in the table.
-
To filter the list, use the search field and click Search.
-
To create or import a key, click Add GPG Key.
Enable 2FA
Use 2FA to add time-based one-time password authentication to your account.
- From the user menu, click Settings.
- In the 2FA section, turn on the 2FA switch.
- When the confirmation message displays, click OK to continue. To keep 2FA disabled, click Cancel.
- After 2FA is turned on, select TOTP. This is the only available 2FA method.
- Scan the QR code with an authenticator app.
- If the QR code is regenerated, scan the new QR code again.
The 2FA section also displays the following TOTP information:
| Field | Description |
|---|---|
| Name | The display name associated with the TOTP setup. |
| User Account ID | The user account linked to the TOTP setup. |
| Shared Password(BASE64) | The shared secret in Base64 format. |
| Shared Password(HEX) | The shared secret in hexadecimal format. |
| Cycles | The TOTP validity interval. The default value is 30. |
| No. | The number of digits in the generated one-time password. The default value is 6. |
| Encryption Scheme | The algorithm used to generate the one-time password. The default value is HmacSHA1. |
After you regenerate the QR code, the previous QR code is no longer valid. Scan the regenerated QR code before using 2FA.
Add a GPG key
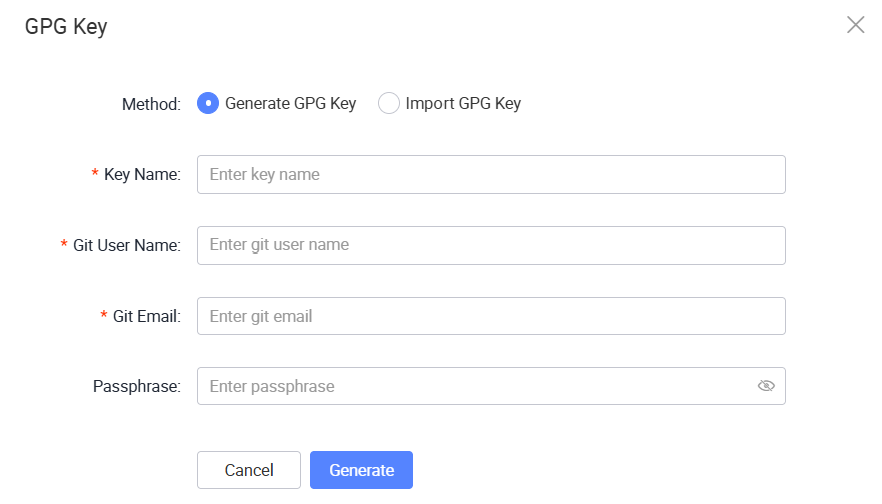
After clicking Add GPG Key, the GPG Key window displays.
- Select one of the following methods:
-
Generate GPG Key: KAIZEN generates a new GPG key for you. Enter a Key Name, Git User Name, and Git Email. Optionally, enter a Passphrase, then click Generate.
-
Import GPG Key: You provide an existing GPG private key. Enter a Key Name, optionally enter the key Passphrase, click Select File to upload the GPG private key file, then click Import.
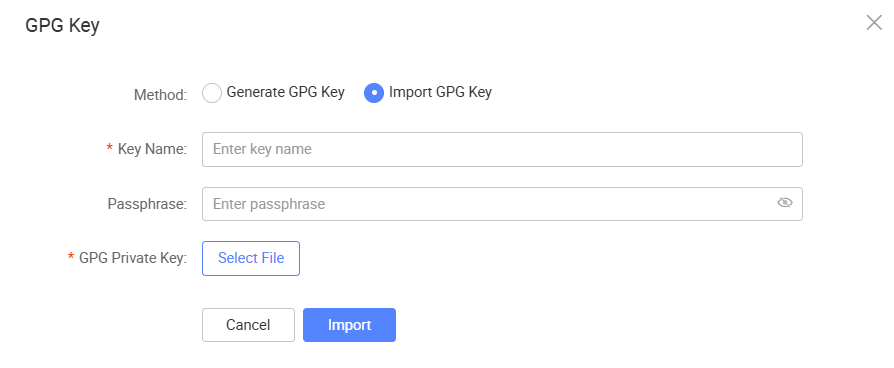
-
Fields marked with an asterisk (*) are mandatory.
About
From the user menu, click About to view product information.
This page shows the current version of KAIZEN 5.3.0 with the software build timestamp.
Logout
Use Logout to end your current KAIZEN session.
- From the user menu, click Logout.
- When a confirmation message displays, click OK to sign out from the session.
Last updated on 21 Sep 2026