Configure datasources
To connect the frontend of your application to its backend, you need to create microservices and then configure the datasources.
Before configuring any custom datasource in App Designer, make sure the corresponding APIs were created in Service Designer through adding datasources.
The following examples show how to create a datasource for commonly-used actions like login and logout.
Create the login datasource
To create the login(1) datasource, perform the following:
-
In the App Designer, navigate to the page containing the login function.
-
Select Datasource
 and click Create.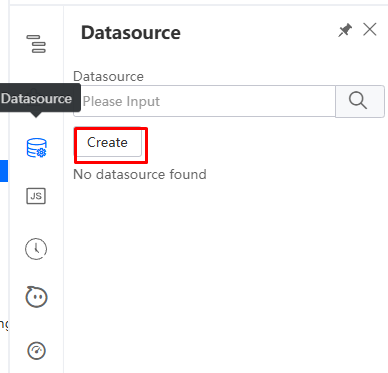
-
In the pop-up window, search for
loginand select the result undergateway.
-
Click Next.

-
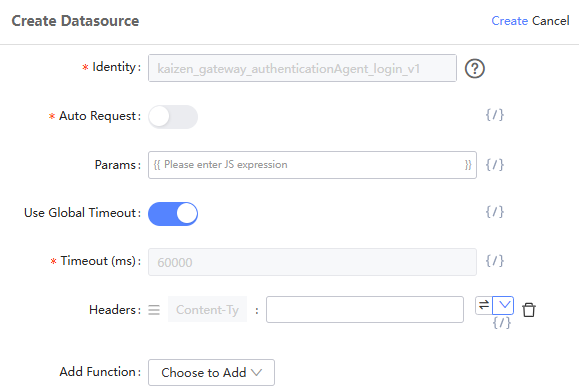
In the Create Datasource window, under Params, click Variable Binding
 to change to the javascript expression.note
This configuration simplifies the process by reducing redundancy, as you can handle multiple values with a single expression, instead of configuring each parameter individually.
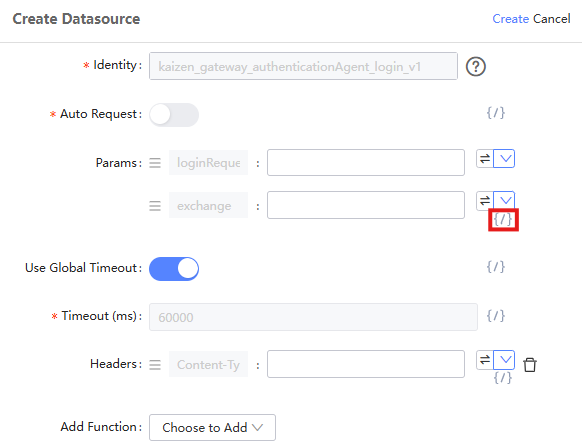
After clicking Variable Binding
:
-
Enter the values:
- Params:
this.state.loginForm - Headers:
application/json - Add Function: Click Choose to Add, select Error Handler Function, and paste the following code:
function(err) {alert("Invalid User ID and/or Password!");}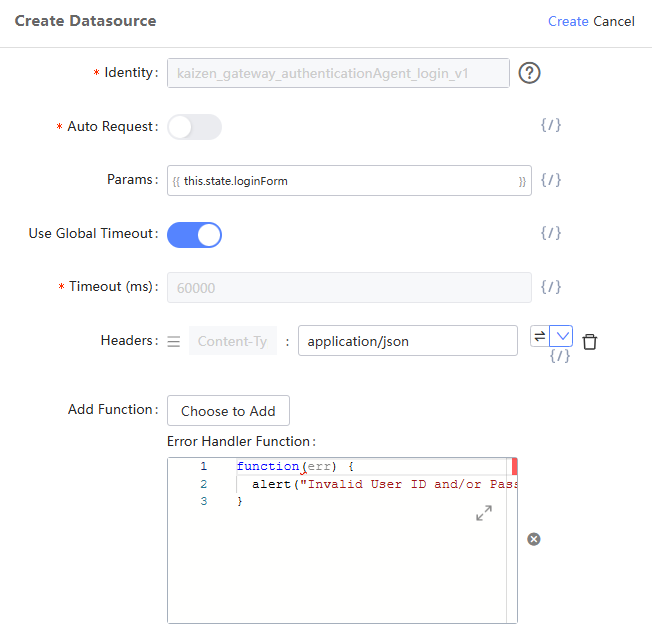
- Params:
-
Click Create.
-
Save the draft and publish the page.
Create the logout datasource
To create the logout(1) datasource, perform the following:
-
In the App Designer, navigate to the page containing the global logout function.
-
Select Datasource
and click Create.
-
In the pop-up window, search for
logoutand select the result undergateway.
-
Click Next.

-
In the Create Datasource window, keep the settings unchanged and click Create.
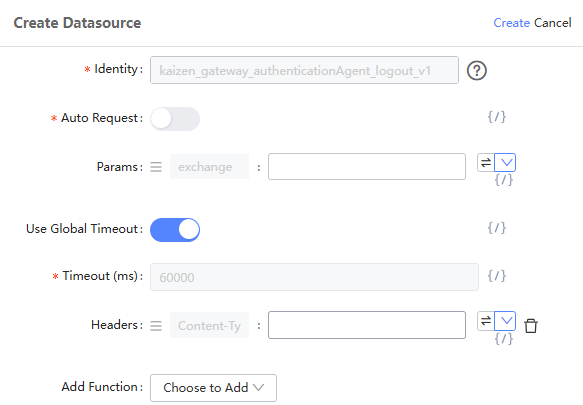
-
Save the draft and publish the page.
Last updated on 20 May 2026