Configure roles
Roles control what users can access within an application. You can create and manage roles from the Config Roles window.
Create a role
To create a role for your application, perform the following:
-
on the application card, click the three-dot icon
 and select Config Roles.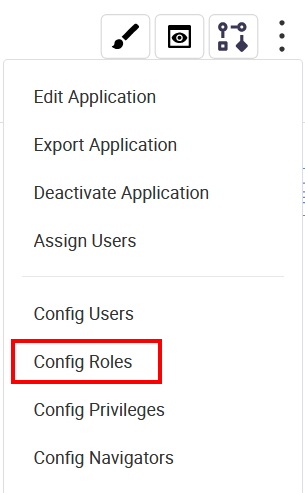
-
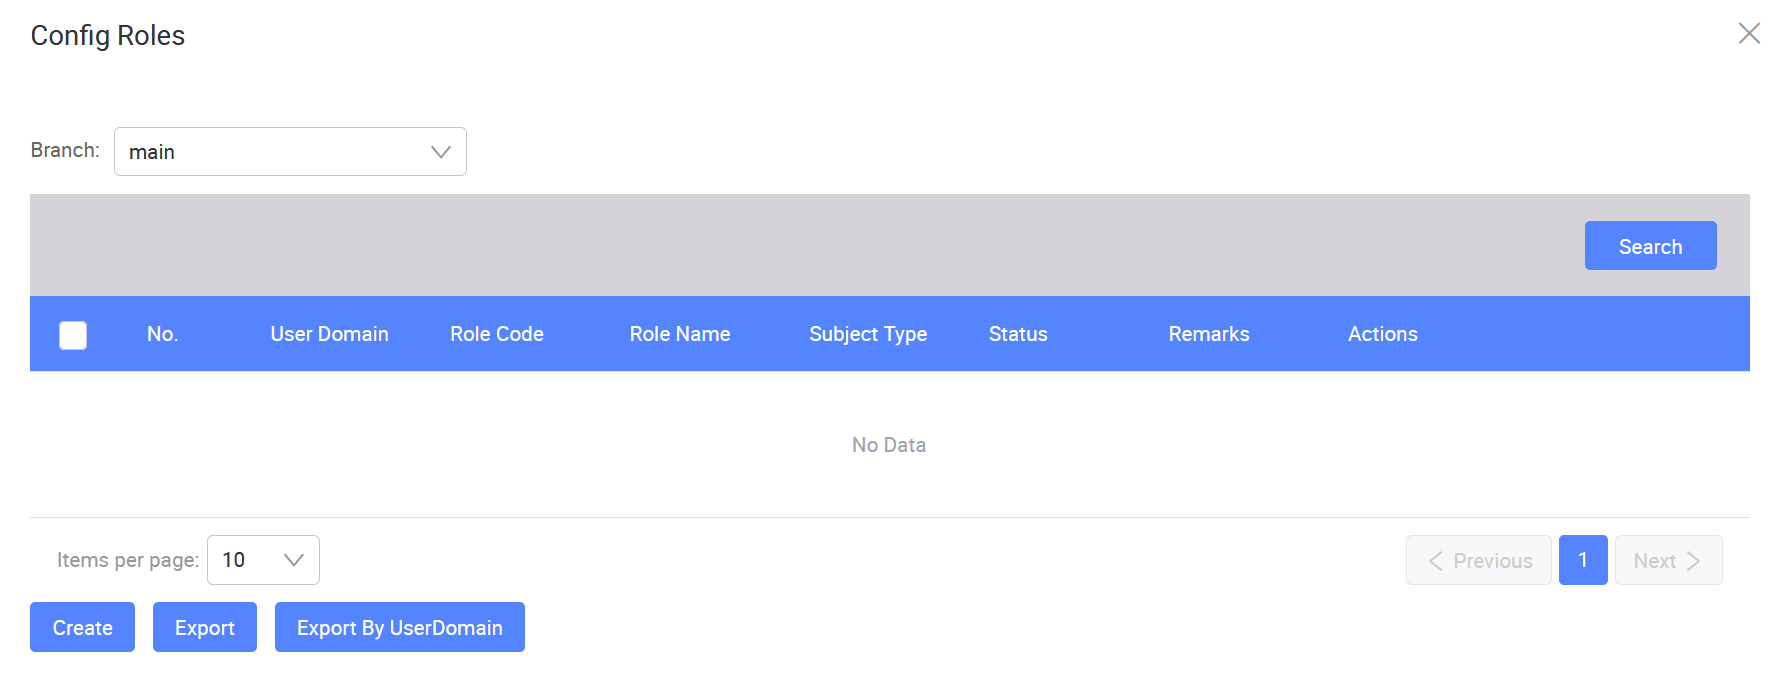
In the Config Roles window, select the target branch from the Branch dropdown.
-
To add a new role, click Create.
-
In the Create Role window, fill in the following fields:
Field Mandatory Description User Domain Yes Select a user domain from the dropdown. Role Code Yes Enter a unique code for the role. Role Name Yes Enter a display name for the role. Subject Type Yes Select the subject type for the role. Status Yes Select Active or Inactive. Defaults to Active. Remarks No Enter any additional notes. -
Click Save. The role will appear in the Config Roles window.
Export a role
To export roles as an XML file, perform the following:
-
In the Config Roles window, select the roles you want to export and click Export.
-
In the Confirm dialog, click OK to proceed.
An XML file containing the role information will be downloaded to your local machine.
Export roles by user domain
To export all roles under a specific user domain as an XML file, perform the following:
-
In the Config Roles window, click Export By UserDomain.
-
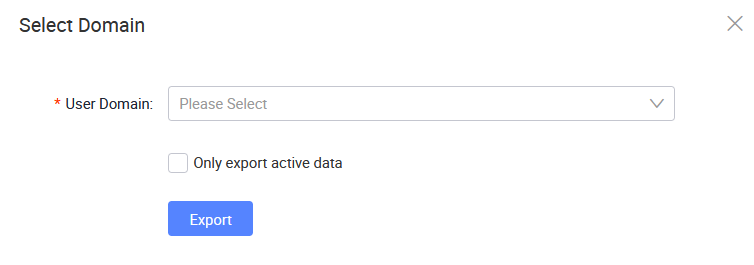
In the Select Domain window, select a User Domain from the dropdown.
Optionally, check Only export active data to exclude inactive roles.
-
Click Export.
An XML file containing the role information for the selected domain will be downloaded to your local machine.
Edit a role
After creating a role, you can edit the role information by clicking the Edit button on the same row.
Except User Domain and Role Code, most fields can be updated. Refer to this table for more details.
After making the changes, click Save.
Deactivate a role
You cannot deactivate a Role if it is currently associated with an Active or Scheduled Workflow. Deactivate or complete the associated workflows before deactivating the role.
To deactivate a role, perform the following:
-
In the Config Roles window, click Deactivate on the same row.
-
In the confirmation dialog, click OK to proceed.
A success message will confirm that the role has been deactivated.
After the deactivation, you have the option to reactivate it following the on-screen instructions.
Assign privileges to a role
To assign privileges to a role, perform the following:
-
In the Config Roles window, click Assign Privileges on the same row.
-
In the Role Assignments window, the role's domain is displayed at the top. The window contains two sections:
- Assigned Privileges: Lists the privileges currently assigned to the role.
- Project Privileges / KAIZEN Privileges: Lists the available privileges that can be assigned. Switch between the tabs to view project-level or KAIZEN-level privileges.
-
In the Project Privileges or KAIZEN Privileges section, select the privileges you want to assign and click Add. The selected privileges will appear under Assigned Privileges.
To remove an assigned privilege, select it under Assigned Privileges and click Remove.
Export privilege assignments
To export a role's privilege assignments as an XML file, perform the following:
-
In the Config Roles window, click Export Privilege Assignments on the same row.
-
In the Role Assignments window, select the assignments you want to export and click Export.
-
In the Confirm dialog, click OK to proceed.
An XML file containing the role's privilege assignments will be downloaded to your local machine.
Last updated on 20 May 2026