Initialise the Git repository
A Git repository must be initialised before you can commit and push code. This creates a new, empty repository in the connected Git provider that corresponds to your application or service. Initialisation is a one-time setup.
If you initialise again with a repository name that already exists, KAIZEN will not create another repository. A message will indicate the repository has already been initialised.
Connect to Git
There are two ways for connecting to your Git repository, as shown in the methods below at the project level and in the App Designer.
At the project level
The following shows an example of how to connect with GitLab:
-
In KAIZEN studio console, click the Git icon
 at the project level and click Connect.
 -
In the Connect to Git window, select your Git provider e.g., GitLab. Click Next.
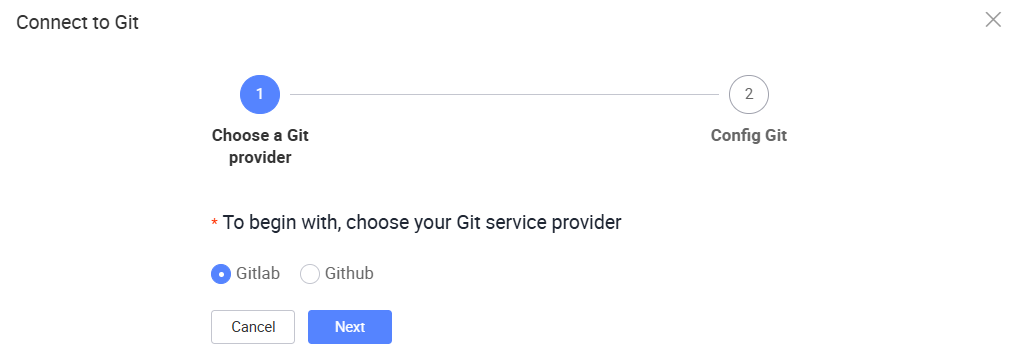
-
Provide information in the following fields:
noteIf you are trying to connect with GitHub, follow similar steps as in the following, except that the URL field will not appear.
- URL: The link to your Git repository, usually in this format:
https://{ProjectName}-gitlab.{OrganizationName}.com/
- Personal Access Token: Get this token with these scopes:
read_repositorywrite_repositoryread_apiapi
- Group: The group name of your repository
Keep the checkboxes unselected and click Test Connect.
- URL: The link to your Git repository, usually in this format:
-
After you receive a "Connect success" message, click Save.
In App Designer
-
In App Designer, click the Git icon
on the left to open the Git panel. Click Connect.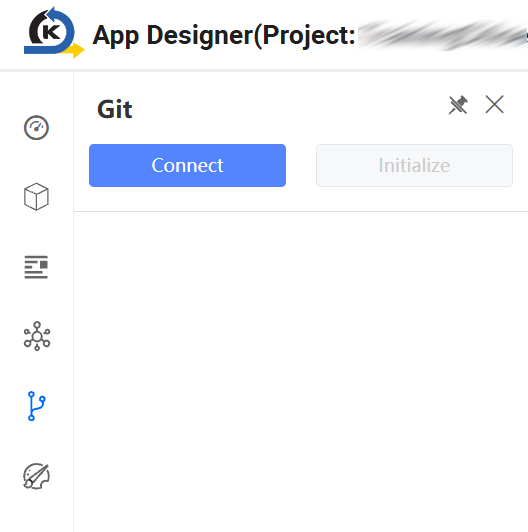
-
In the Connect to Git window, select your Git provider e.g., GitLab. Click Next.
-
Provide information in the following fields:
noteIf you are trying to connect with GitHub, follow similar steps as in the following, except that the URL field will not appear.
- URL: The link to your Git repository, usually in this format:
https://{ProjectName}-gitlab.{OrganizationName}.com/
- Personal Access Token: Get this token with these scopes:
read_repositorywrite_repositoryread_apiapi
- Group: The group name of your repository
Keep the checkboxes unselected and click Test Connect.
- URL: The link to your Git repository, usually in this format:
-
After you receive a "Connect success" message, click Save.
Initialise the repository
There are three ways for initialising the Git repository, as shown in the methods below at the project level, in the App Designer, and in the Service Designer.
At the project level
If you perform this action, the apps and services in the project will all be initialised.
-
In the studio console, click the Git icon
at the project level and select Initialize. -
The Initialize window opens. You have the option to customise the names for
product,config, anddatabase. Click Initialize.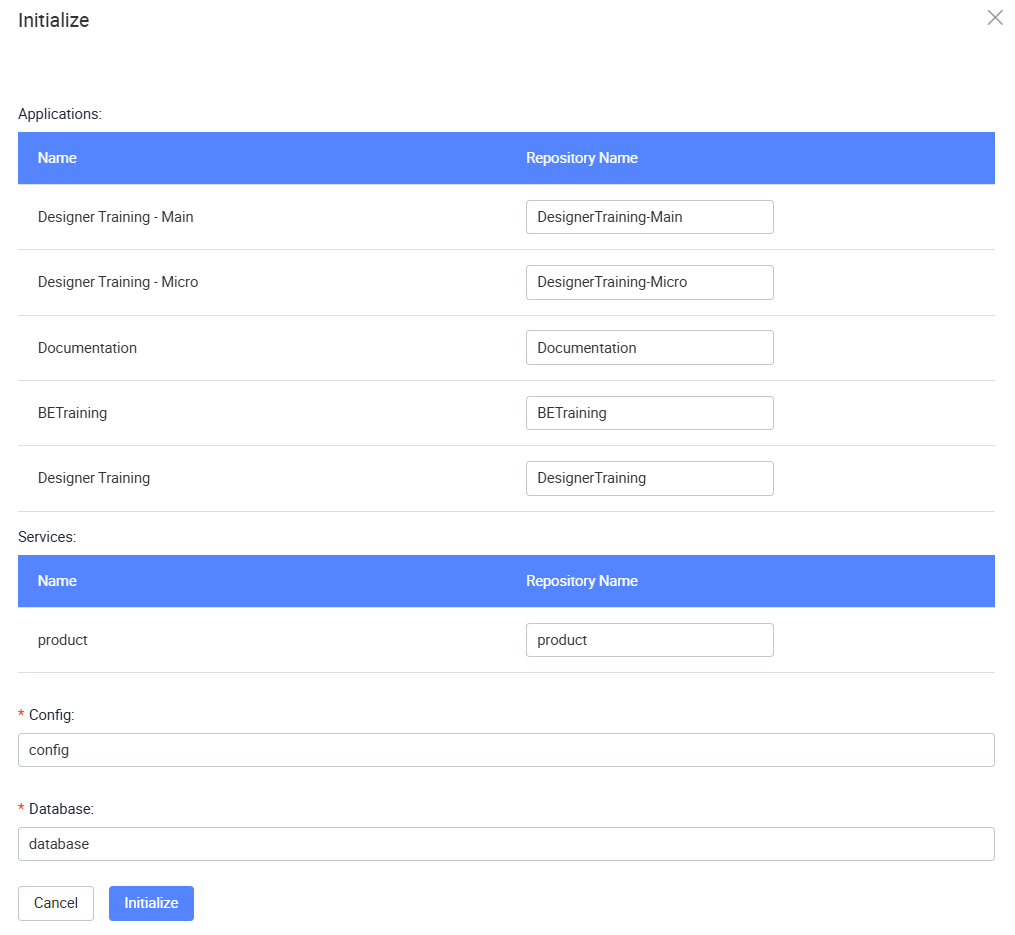
Wait until a message pops up, saying Repositories initialization to Git was successful....
If you have initialised the Git repository at the project level, you do not need to initialise it again in App Designer or Service Designer.
In App Designer
To initialise a FE repository, perform the following:
-
In App Designer, click the Git icon
on the left to open the Git panel. -
Click Initialise.
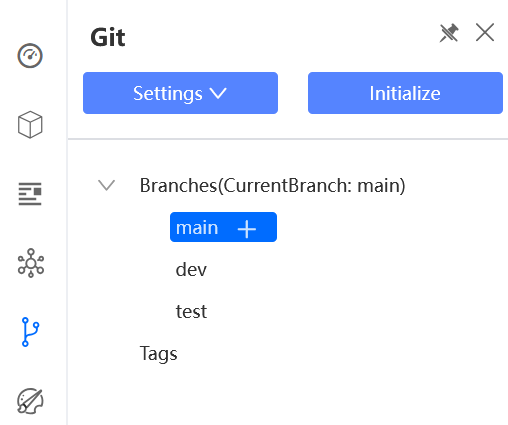
-
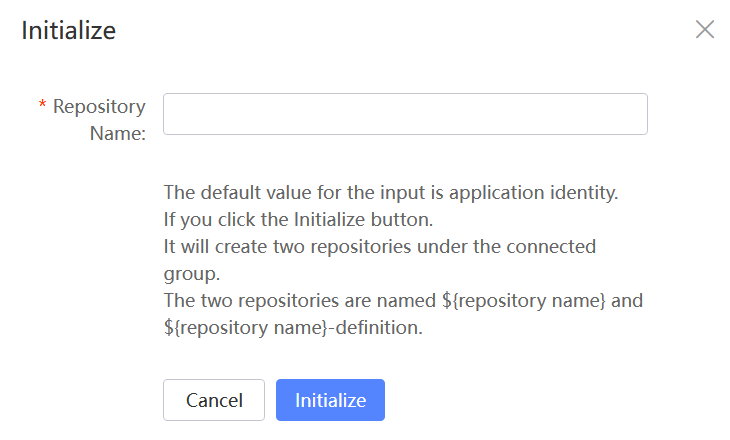
Enter the Repository Name. The default value is the application identity.
-
Click Initialise. The system will create two repositories:
Repository Description <name>Frontend generated React code <name>-definitionFrontend screen pages which store the JSON schema (JS definitions etc.). This schema is rendered during runtime and on preview to load the page.
In Service Designer
To initialise a BE repository, perform the following:
-
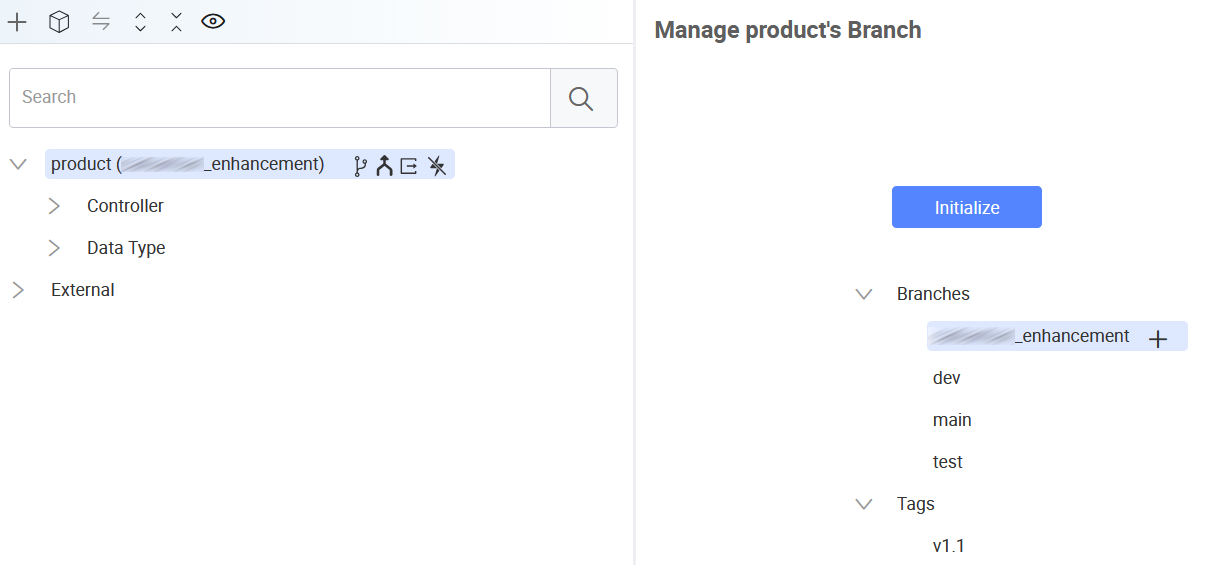
In Service Designer, click the Git icon
on your service. -
On the right side, click Initialise.
-
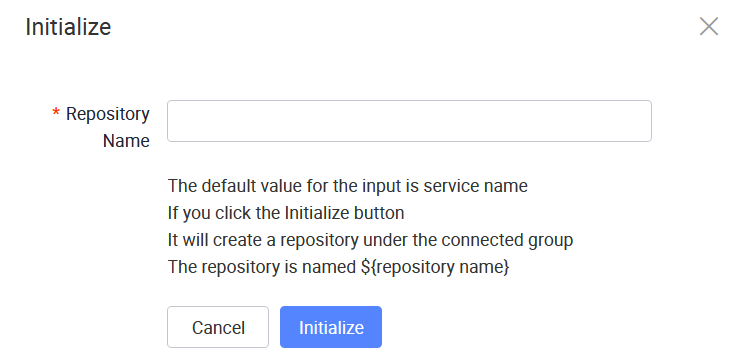
Enter the Repository Name. The default value is the service name.
-
Click Initialise to create one repository.
Last updated on 20 May 2026