Manage controllers
A controller is a backend component that receives incoming HTTP requests, routes them to the appropriate business logic, and returns responses. Controllers are the entry points for a service's REST API.
When you select a service in the Setting panel, the Configuration panel on the right becomes the main workspace for defining its core components. At the top of this panel, you will find the Controllers section. A single service can have multiple controllers to logically group related API endpoints. For example, a Product service might have a ProductController for managing product data and a separate InventoryController for managing stock levels.
Add a new controller
Adding controllers allows you to organise API endpoints into logical groups within a service.
To add a controller, perform the following:
-
Select the service in the Setting panel. Click the + sign at the Controller dropdown.
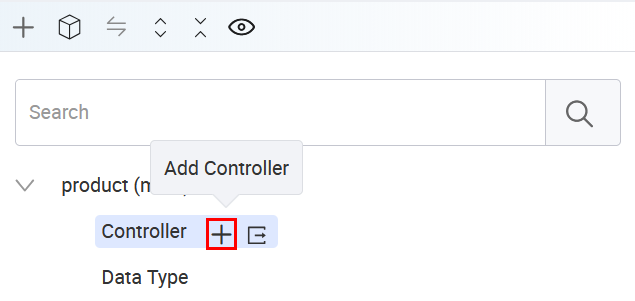
The Add Controller window appears in the Configuration panel.
-
Fill in the required fields:
-
Name: A descriptive name that reflects the functionality it will manage (e.g.,
ProductController). -
Controller Package: An optional sub-package path to further organise the code. If left blank, it uses the default path defined in the service configuration.
-
Service Package: The base Java package path for this service. All other package paths are relative to this one.
-
-
Click Apply to create the controller. It will appear in the list of controllers within the service.
Edit an existing controller
A controller's configuration, such as its name or package path, can be updated to reflect new application requirements.
To edit a controller, perform the following:
-
In the Setting panel, click the controller name. The Edit Controller window appears. You can modify the controller properties, including the name, controller package, and service package.
-
After making the changes, click Apply to save them.
Last updated on 20 May 2026