Manage endpoints
After creating or importing endpoints, use the Assignments page to map privileges to endpoints. Only users whose roles contain the mapped privileges will be authorised to call the secured endpoints.
Endpoints represent the API resources that are secured within KAIZEN's Identity and Access Management (IAM) framework. Each endpoint defines an API URL pattern that the system uses to enforce access control at the API level.
- Endpoints are mapped to privileges, which determine whether a user is authorised to call a specific API.
- Each endpoint is associated with a specific HTTP method (GET, POST, PUT, DELETE), a URL pattern, and a match type that controls how the URL is evaluated.
- By securing endpoints, administrators can prevent unauthorised users from performing backend operations such as creating, reading, updating, or deleting data, even if the frontend UI elements are hidden.
Administrators can create and manage endpoints as required, associate them with the appropriate privileges through assignments, and export or import endpoint configurations for backup or migration purposes.
Manage the endpoints
To manage the endpoints, perform the following:
-
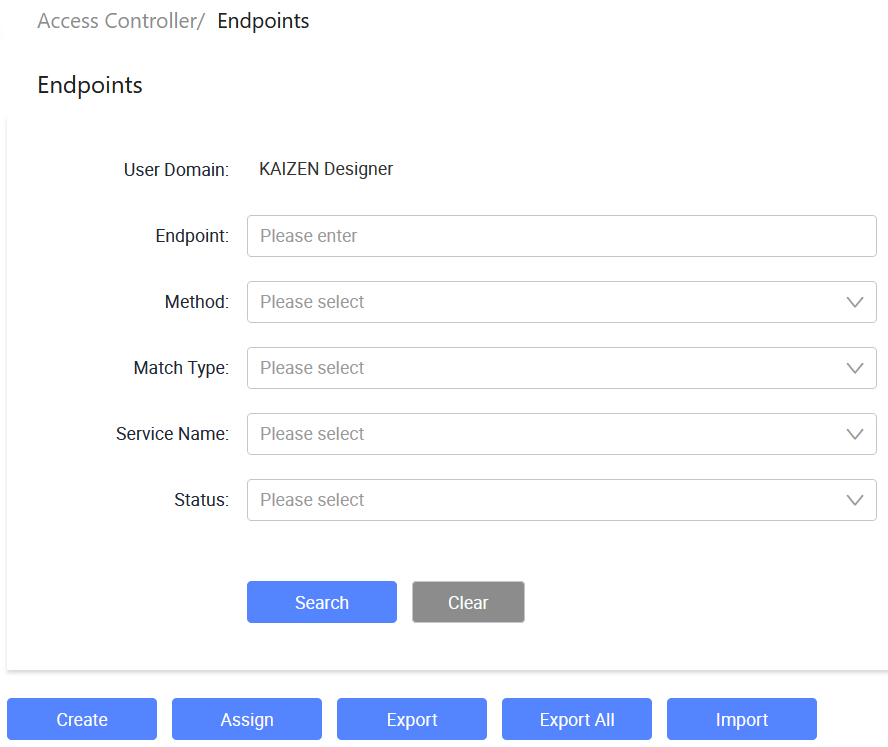
In the KAIZEN studio console, on the left panel, click Access Controller > Endpoints.
The Access Controller/ Endpoints page displays.
-
From here, you can create new endpoints, search for existing endpoints, import or export endpoints, and so on. Each row in the table provides the following actions under the Actions column:
- View: Opens the endpoint details in read-only mode.
- Edit: Opens the endpoint details for editing.
- More: Expands a dropdown with additional actions: Assign and Deactivate.
Create an endpoint
-
In Access Controller/ Endpoints, click Create.
-
In the Create Endpoint window, provide the details:
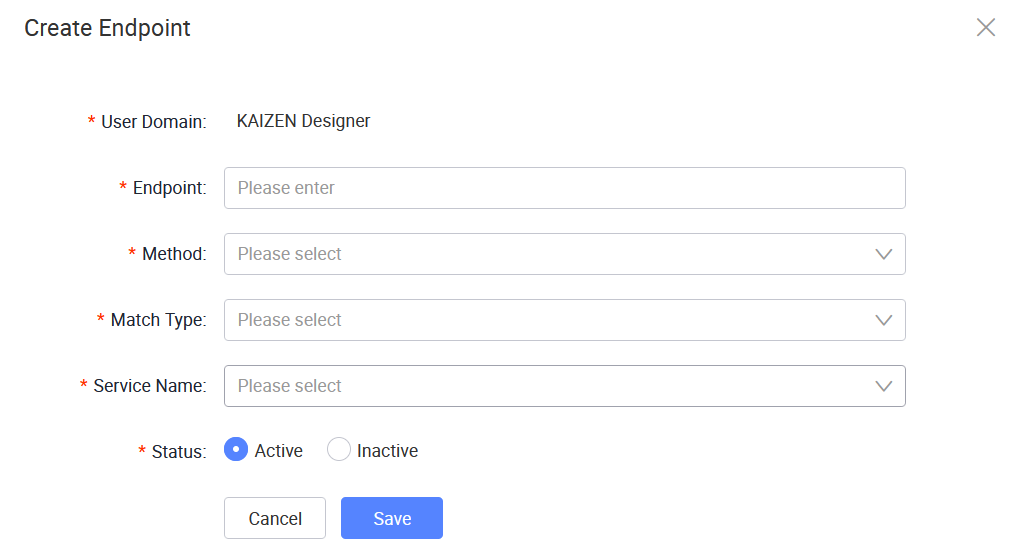
The following table describes each field from the window above:
Field Required Description User Domain Yes Displays the user domain for the endpoint. Endpoint Yes Enter the endpoint URL path. Method Yes Select the HTTP method for the endpoint. Match Type Yes Select the matching type used to evaluate the endpoint path. Service Name Yes Select the service that the endpoint belongs to. Status Yes Sets the status of the endpoint. -
Click Save.
Search endpoints
To search for endpoints, perform the following:
-
In Access Controller/ Endpoints, enter or select the search criteria.
Field Description User Domain Displays the user domain for the current session. Endpoint Search for endpoints by their URL path. Method Filter endpoints by HTTP method. Match Type Filter endpoints by match type. Service Name Filter endpoints by service name. Status Filter endpoints by their status. -
Click Search to find the result.
Assign or remove privileges to an endpoint
To assign or remove privileges to an endpoint, perform the following:
-
In Access Controller/ Endpoints, open the Endpoint Assignment window using one of the following methods:
- Select the endpoint and click Assign at the top of the page.
- Click More on the same row as the endpoint, then click Assign.
-
In the Endpoint Assignment window, review the selected endpoint and its user domain.
The window contains the following sections:
Section Description Assigned Privileges Lists the privileges that are currently assigned to the endpoint. Available Privileges Lists the privileges that can be assigned to the endpoint. -
Use Search in either section to find specific privileges.
-
Manage privileges associated with this endpoint:
-
To assign privileges, select the privileges from Available Privileges and click Add.
The selected privileges appear in Assigned Privileges and are assigned to the endpoint.
-
To remove privileges, select the privileges from Available Privileges and click Remove.
The selected privileges disappear in Assigned Privileges and are removed from the endpoint.
-
Deactivate an endpoint
To deactivate an endpoint, perform the following:
-
Click More on the same row as the endpoint, then click Deactivate.
-
In the confirmation dialog, click OK.
A success message will confirm that the endpoint has been deactivated. The endpoint status will change from Active to Inactive.
After the deactivation, you have the option to reactivate it by clicking Activate.
Export endpoints
To export an endpoint, perform the following:
-
In Access Controller/ Endpoints, select the endpoint you want to export.
-
Click Export.
-
The Confirm window pops up, asking for confirmation. Click OK.
An
XMLfile containing the selected endpoint information will be downloaded in your browser.
Export all endpoints
To export all endpoints, perform the following:
-
In Access Controller/ Endpoints, click Export All.
-
The Confirm window pops up, asking for confirmation. Click OK.
An
XMLfile containing the information of all endpoints will be downloaded in your browser.
Import endpoints
To import endpoints from an existing XML file, perform the following:
-
In Access Controller/ Endpoints, click Import. The Import Endpoint window opens.

-
Select the Import Endpoint From Service checkbox only when the file was exported from Service Designer.
noteThe file containing the endpoint can be exported from either the Access Controller/ Endpoints page, or Service Designer.
-
Click Select File. The File Explorer window opens.
-
Browse to the
XMLfile that contains the endpoint information. Click Open. Click Import.A message will pop up, showing the import is successful.
Last updated on 21 Sep 2026