Create a new application
A new application is associated with the currently active branch only. Make sure you are on the correct branch before creating an application. For more details, refer to Manage branches.
Click Create in the center or the + sign on toolbar
After your project is created and your account is assigned to the project, use one of the following methods to create a new application.
Both methods launch the same process for defining and building the new app.
- From the Create button
- From the project toolbar
A newly created project displays "No app has been created" in the centre of its area in Studio Console.
Click the dropdown arrow at the Create button.


Alternatively, on the project toolbar, click the + sign.

Two options display.
- Start from a template: Use an existing template to create your app.
- Create application: Create your app from a blank canvas.
Create the application from a template or a blank canvas
Start from a template
From here, choose to build a new app based on an existing template as the foundation. Templates in KAIZEN are pre-built pages or applications, which include layouts, components, or basic logic. Templates provide a starting point for you to reuse and customise existing design, reducing the time and efforts to fulfil specific requirements.
-
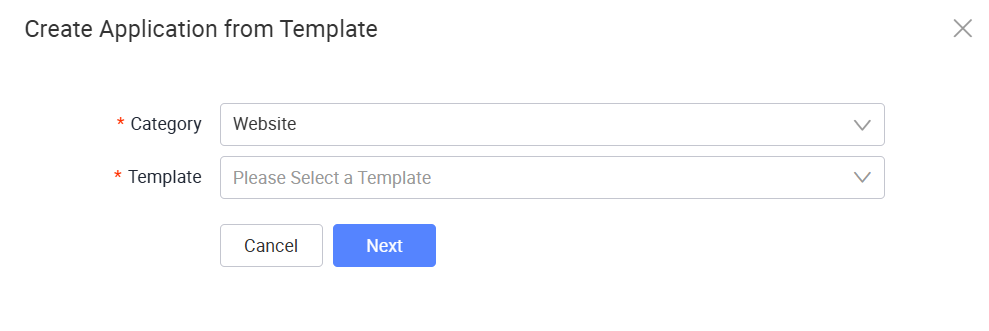
Click Start from a template. The Create Application from Template window displays.
-
In the Category dropdown, choose one of the following options:
- Dashboard
- Mobile UI
- Charts
- Website
-
In the Template dropdown, select a template to start building your app.
-
Select the pages you want or choose the Select all option. Click Next.
-
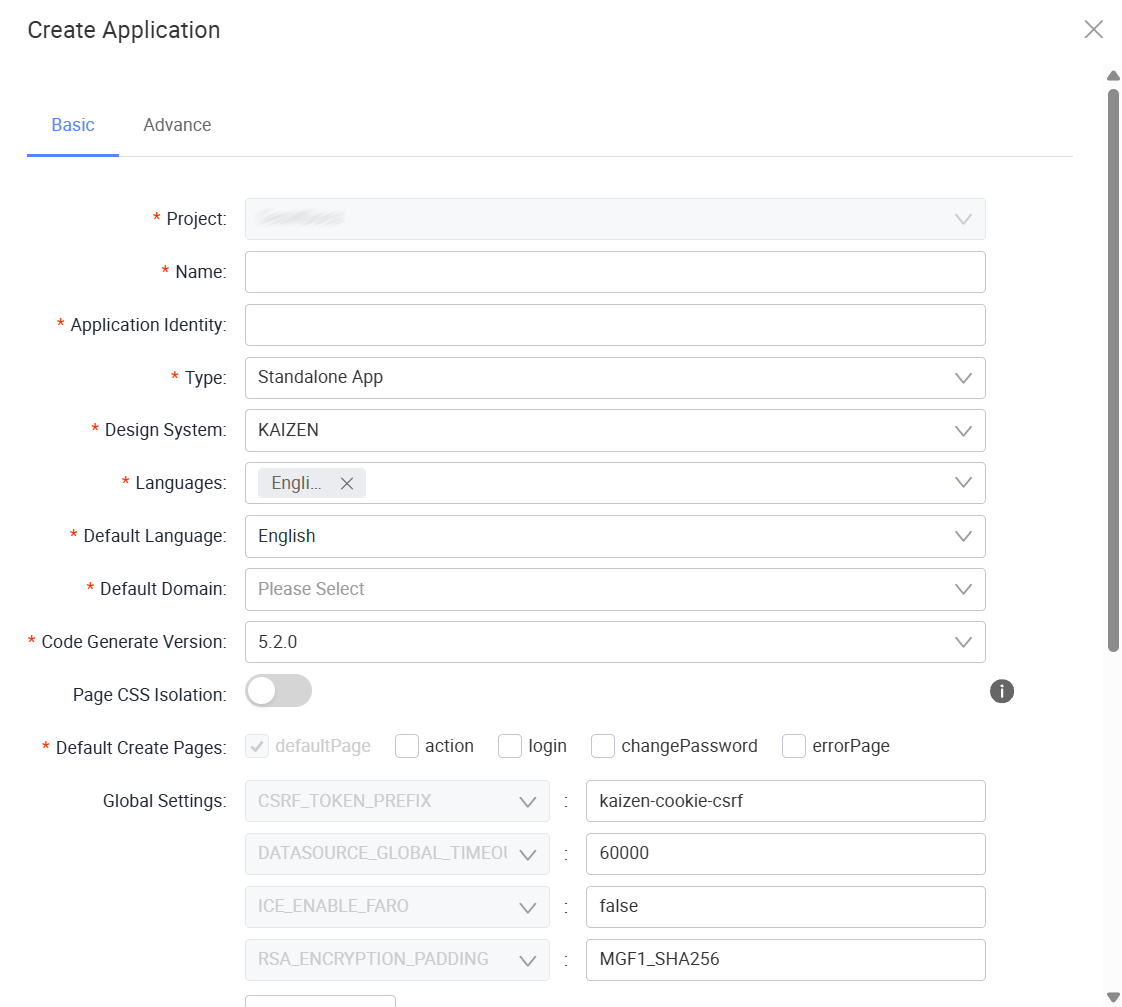
In the Create Application window, fill in the mandatory fields. If needed, provide details in the optional fields.
See Configure application details to learn more.
-
Click Save. The new application appears in the project.
Start from a blank canvas
This creates a completely empty application container within the project. It provides a clean state with no pre-configured pages, components, or logic. It provides:
- Complete freedom and control over the application structure.
- Maximum flexibility for your design and configuration.
-
Click Create application.
-
In the Create Application window, fill in the mandatory fields. If needed, provide details in the optional fields.
See Configure application details to learn more.
-
Click Save. The new application appears in the project.
Configure application details
When you create or edit an application, the Create Application window contains two tabs: Basic and Advance. Configure the following settings:
Basic
| Field Name | Mandatory | Description |
|---|---|---|
| Project | Yes | The parent project which contains the new application. Usually pre-filled. |
| Name | Yes | The unique, human-readable name for the application (e.g., "Customer Portal"). |
| Application Identity | Yes | A unique, machine-readable identifier for the application, often used in URLs and API paths. |
| Type | Yes | The application's architecture. The options include Standalone, Main App, Micro, or React Native App to support micro-frontend or modular designs. |
| Design System | Yes | Select the design system for the application (e.g., KAIZEN). |
| Micro Applications | No | When Type is set to Main App, select the micro applications to integrate into this main application. |
| Languages | Yes | Select the languages the application supports for internationalisation (i18n). |
| Default Language | Yes | Choose the default language that the application displays for users. |
| Default Domain | Yes | Assign the application to a specific User Domain for Identity and Access Management (IAM), controlling which group of users have the access. |
| KAIZEN Version | Yes | Displays the current KAIZEN platform version (e.g., 5.2.0). This field is read-only. |
| Code Generate Version | Yes | Select the KAIZEN version for code generation. |
| Default Create Pages | Yes | Choose from the options including defaultPage, action, login, changePassword, and errorPage. |
| Global Settings | No | A key-value store for advanced configurations at the application level, such as security token prefixes (e.g., CSRF_TOKEN_PREFIX). |
| Status | Yes | The initial status of the application. Active means it is live and operational, while Inactive keeps it disabled. |
Advance
| Field Name | Mandatory | Description |
|---|---|---|
| Description | No | An optional, more detailed summary of the application's purpose. |
| Advanced Responsive | No | When enabled, activates advanced responsive behaviour for the application, allowing more granular control over how layouts adapt across different screen sizes. You need to enable this option to control the Global or Device responsive option on the Styles tab for each component. |
| Logo | No | Click Upload File to upload the main logo for the application, which will be used on the login page or in the header. |
| Favicon Logo | No | Click Upload File to upload the small icon that appears in the browser tab. |
| Error Pages | No | Configure custom pages that will display for different error codes (e.g., 404 Not Found, 500 Internal Server Error). |
| Login Page URL | No | Specify the URL for the application's login page. |
| Common Service | No | Define a common backend service URL that the application will use. |
| Context Path | No | The URL subdirectory where the application is hosted (e.g., /portal). If left blank, the Application Identity value is used by default. |
| Browser Tab Name | No | Set the default text that appears in the browser tab for the application. |
| Use Static Data For Viewer | No | When enabled, the application uses static datasources for the viewer. |
Assign users to an application
You can assign users to applications directly from the Studio Console home page, without going through the admin panel.
Assign a user
-
In KAIZEN studio console, use the following methods to assign a user to the applications at the project level, or to one application individually:
- At project level
- To one application
On top of the project applications, click Assign Users To Applications
 .
.The Assign Users To Applications:
project_namewindow opens.On the application card, click the three-dot icon
 at the bottom right.
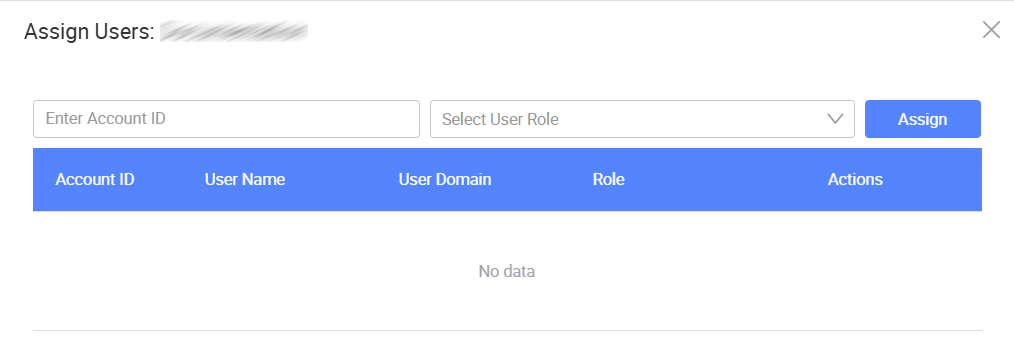
The Assign Users:
application_namewindow opens. -
In this window, perform the following:
-
Enter the user's Account ID.
-
(Conditional) If the Select Applications dropdown appears, choose the app for the user.
-
Select an appropriate User Role from the dropdown according to your project requirements.
The dropdown lists out the following pre-defined roles for your selection:
Role Description Application Leader Full management rights over the application. Application Manager Management rights for the application. Developer Development access to the application. UI Designer UI design access to the application. Internal Viewer Read-only access for internal users. External Viewer Read-only access for external users.
-
-
Click Assign.
The assigned user will appear in the table with their User Domain, Account ID, User Name, and Role.
-
Repeat this step for each user you want to add to the project.
View and remove assignments
The table below the assignment fields lists all existing user assignments for the project, showing the User Domain, Account ID, User Name and Role for each entry. Click Remove in the Actions column to remove a user's access to an application.
Use the Search button to filter the table by the criteria you have entered.
Create pages for your application
For more details on how to add pages into your app, refer to Create a new page.
Last updated on 20 May 2026