Import or export a workflow
Importing and exporting workflows minimises the repetition of creating any existing workflow, enhances the reusability, and reduces the development efforts.
Export a workflow
To export a workflow, perform the following:
-
In the studio console, find the app where you want to export the workflow.
-
At the bottom right corner of your app, click
 to open the Workflow Designer.
 -
In Workflow Designer, a window displays, listing all historical workflows for you to choose from. Select the file you want to export. Click Open.
-
From the bottom right corner of the file, click
 to export.
- BPMN
- DMN
If you export a
BPMNfile, select Export as BPMN.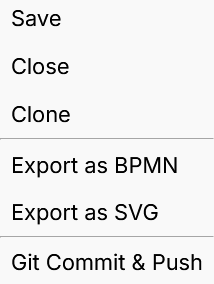
If you export a
DMNfile, select Export as DMN.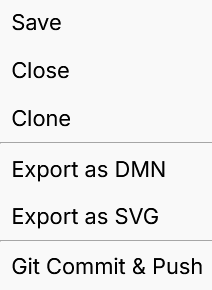
A file in the same format will be downloaded in your browser.
noteYou have the option to select Export as SVG. This will export the workflow into a vector image in
SVGformat. It helps you preview the appearance of the workflow, but it is unable to be imported.
Import a workflow
Before importing a workflow, ensure that all Roles and User Groups referenced in the workflow already exist in the target environment. The import will fail if any referenced Role or User Group is missing.
To import a workflow from an existing BPMN or DMN file, perform the following:
-
In Workflow Designer, at the bottom right corner, click the + sign to open the Workflow Model window.
-
Choose the file type you want to import.
- BPMN
- DMN
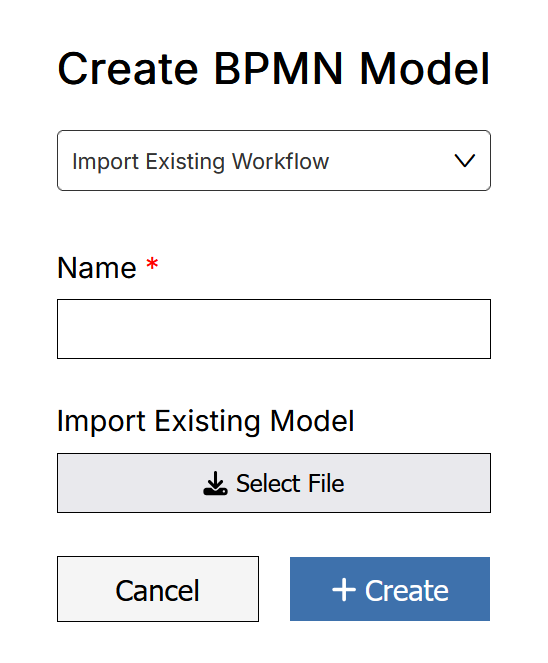
If you select BPMN, the Create BPMN Model window opens.
-
From the dropdown, select Import Existing Workflow.
-
Fill in the name for the new workflow.
-
Under Import Existing Model, click Select File. The File Explorer window opens.
-
Browse to the BPMN file you want to import. Click Open. Click Create.
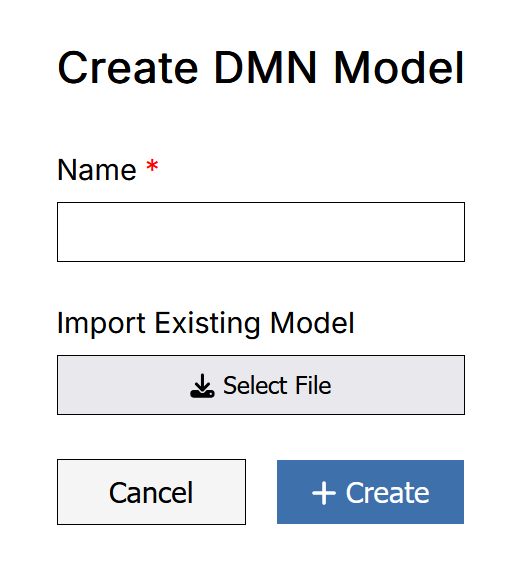
If you select DMN, the Create DMN Model window opens.
-
Fill in the name for the new workflow.
-
Under Import Existing Model, click Select File. The File Explorer window opens.
-
Browse to the DMN file you want to import. Click Open. Click Create.
The workflow will be imported and appear on the canvas.
Last updated on 20 May 2026