Build AI agent flows in your project
AI Agent Builder lets you manage the projects and flows for building AI workflows.
Projects
The Projects panel displays the current project. Select the project to view its flows.
Upload a flow
You can upload an existing flow in JSON format to the current project.
-
In the Projects panel, click the upload icon.
-
Select the JSON file that contains the flow.
-
Upload the file. The uploaded flow is added to the current project.
Rename the project
-
In the Projects panel, hover over the project name. Click the ... icon.
-
Click Rename.
-
Enter the new project name and press Enter. The project is renamed immediately.
Download the project
-
In the Projects panel, hover over the project name. Click the ... icon.
-
Click Download. The project is downloaded as a ZIP file.
Upload or import files
Use My Files to add files that can be used in the current project.
-
At the bottom of the Projects panel, click My Files.
-
On the Files page, click Upload Files.
-
Upload files from your device or import them from your preferred cloud service.
Flows
Select a project, then click the Flows tab to manage its flows. The table displays the following information:
| Column | Description |
|---|---|
| Flow Name | The name of the flow. Click the name of an active or inactive flow to open it in AI Agent Builder. |
| Revision | The version of the flow. |
| Status | Indicates whether the flow is Active or Inactive. |
| Deployed Date | The date when the flow is uploaded for the first time. |
| Active Date | The date when the flow gets activated. |
| Actions | Provides actions for managing the flow. |
When you leave a flow after making changes, the Save flow window asks how to save them:
- Click Overwrite Current Revision to save the changes to the current revision.
- Click Create New Revision to retain the current revision and save the changes as a new revision.
Create a new flow
-
On the Flows tab, click New Flow.
-
The template window opens.
-
Select a template or click Blank Flow to start from an empty canvas.
For more information about the available starting points, refer to AI Agent Builder overview.
Search the flows
Use the search field to find a flow by name. As you type, the table displays the matching flows.
Filter the flows by status
Use the status filter beside the search field to control which flows appear:
- All: Displays active and inactive flows.
- Active only: Displays only active flows.
- Inactive only: Displays only inactive flows.
Edit the flow details
-
Find the flow on the Flows tab.
-
Under Actions, click the ... icon.
-
Click Edit Details.
-
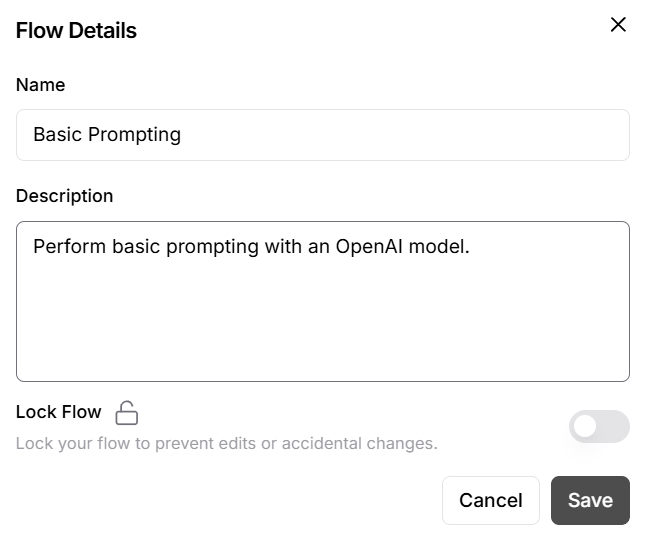
In the Flow Details window, update the Name or Description.
-
To prevent edits or accidental changes to the flow, turn on Lock Flow.
-
Click Save to apply the changes.
Export the flow
-
Find the flow on the Flows tab.
-
Under Actions, click the ... icon.
-
Click Export.
-
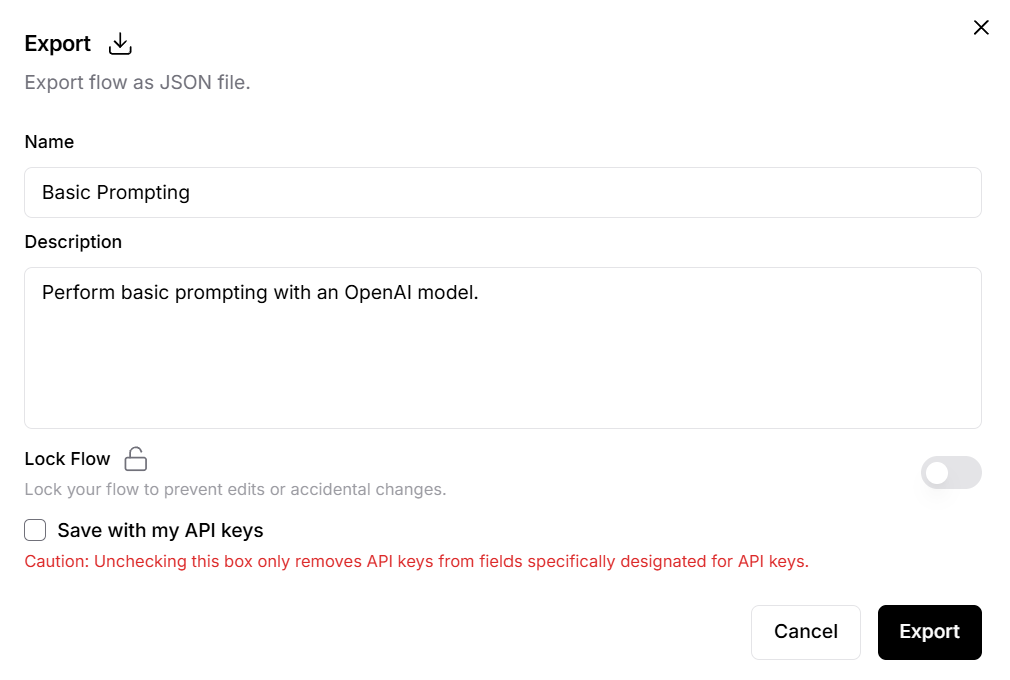
In the Export window, update the Name or Description if required.
-
To include API keys in the exported flow, select Save with my API keys.
Clear this option to remove keys from fields specifically designated for API keys.
-
Click Export. The flow will be exported as a JSON file.
Duplicate the flow
-
Find the flow on the Flows tab.
-
Under Actions, click the ... icon.
-
Click Duplicate. The duplicate is created immediately. Its revision number is increased by one.
Deactivate or reactivate the flow
To deactivate an active flow:
-
Find the active flow on the Flows tab.
-
Under Actions, click the ... icon.
-
Click Deactivate. The flow becomes inactive immediately.
To reactivate an inactive flow:
-
Set the status filter to All or Inactive only.
-
Find the inactive flow.
-
Under Actions, click the ... icon.
-
Click Activate. The flow becomes active immediately.
Delete a flow
Deleting a flow permanently removes that revision and cannot be undone.
Only inactive flows can be deleted.
-
Set the status filter to All or Inactive only.
-
Find the inactive flow.
-
Under Actions, click the ... icon.
-
Click Delete.
-
In the confirmation window, click Delete.
MCP Server
Access your Project's flows as Tools within a MCP Server. Refer to Projects as MCP Servers guide for more details.
Limitations
Using AI Agent Builder as an MCP server is not supported at this time. MCP server access for projects and flows is currently unavailable.
Last updated on 21 Sep 2026